Tracy for Organizing Work With Candidates and Conducting Interviews (HR): A Step-By-Step Setup Guide
If you’re conducting interviews, you probably need to store candidate information somewhere: each person’s contacts, a resume file, the platform on which you received feedback, your impressions, and perhaps also the impressions and evaluations of other team members (or, if a person, for example, did not come to the scheduled interview and did not warn about it—the appropriate mark). It is much more convenient to do this in Tracy than in a regular table:
In Tracy, you can work with candidates on a Kanban board, schedule interviews on a calendar or Gantt chart, analyze the hiring funnel, flexibly configure access for your colleagues, notifications, and more:

1. Application Installation
Tracy is available on all popular platforms—Android, iOS, macOS, Windows, and web (that is, it also works in the browser, no installation required). To select and download, please go to the website: https://tra.cy.
2. Registration
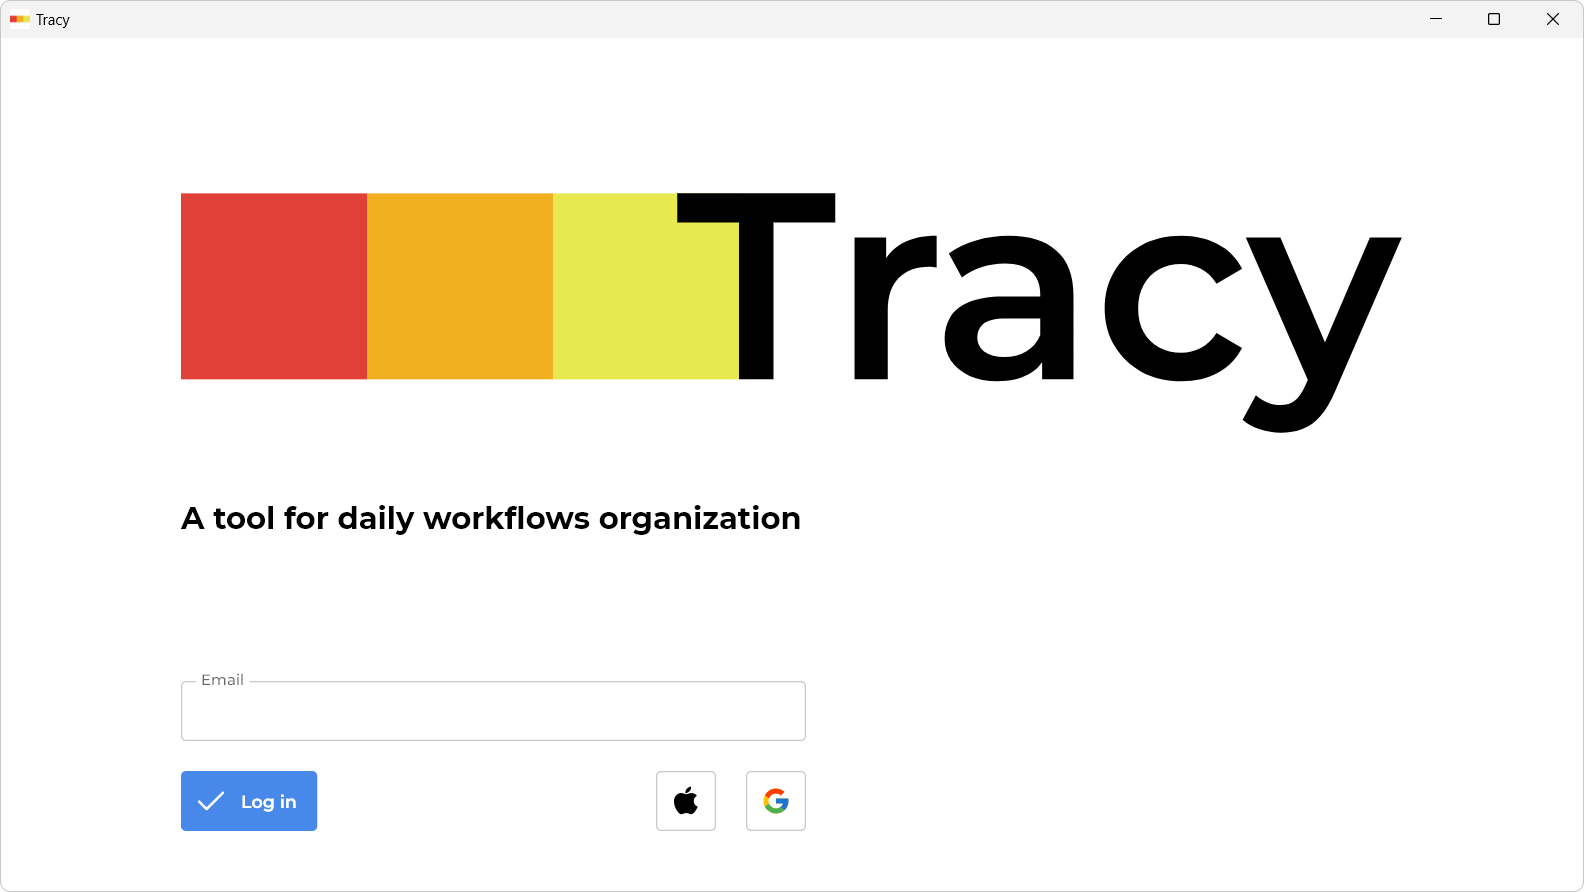
The first time you launch the app, you’ll be asked to sign in with either your email and one-time password, or your Apple or Google account:
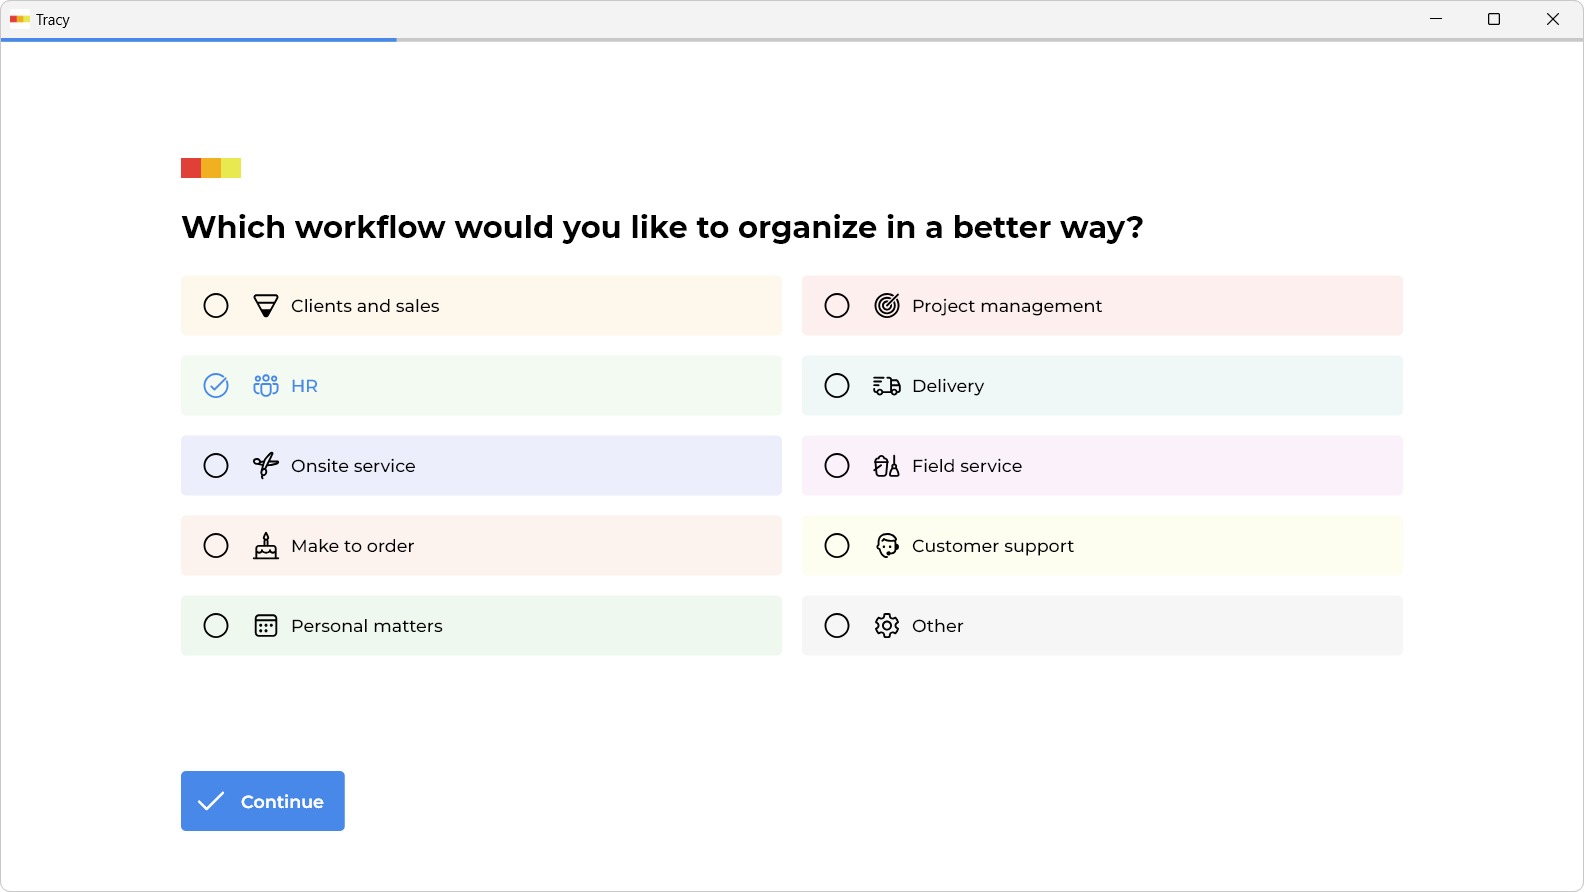
Next up, you’ll find a selection of basic templates to give you a head start and save some of your time. Functionally, they’re all on the same page—the only variance lies in the initial content and settings. For our purposes, let’s roll with “HR”:
Next, enter the name of your organization and your name and create a workspace. You can also add your colleagues later.
3. Candidate Details
Let’s see what we get after registration:
We have 3 test candidates to make it easier for you to understand everything. They can be reviewed and deleted (by pressing the three dots from the bottom of the candidate window to see the context menu), but for now, we will try to create another one. For this, we will click on the plus sign:
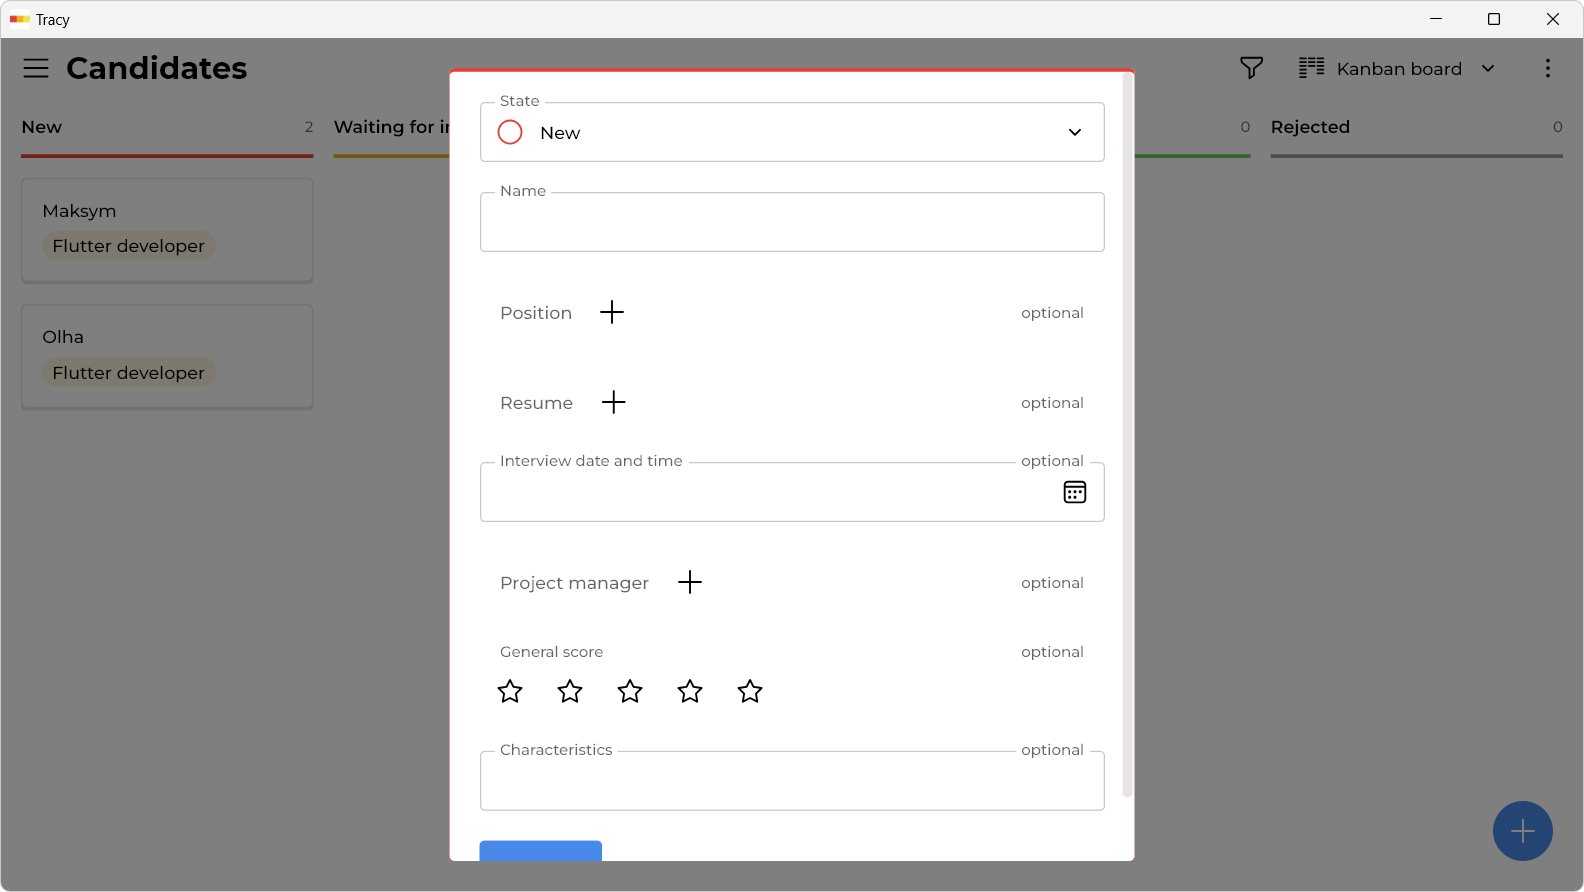
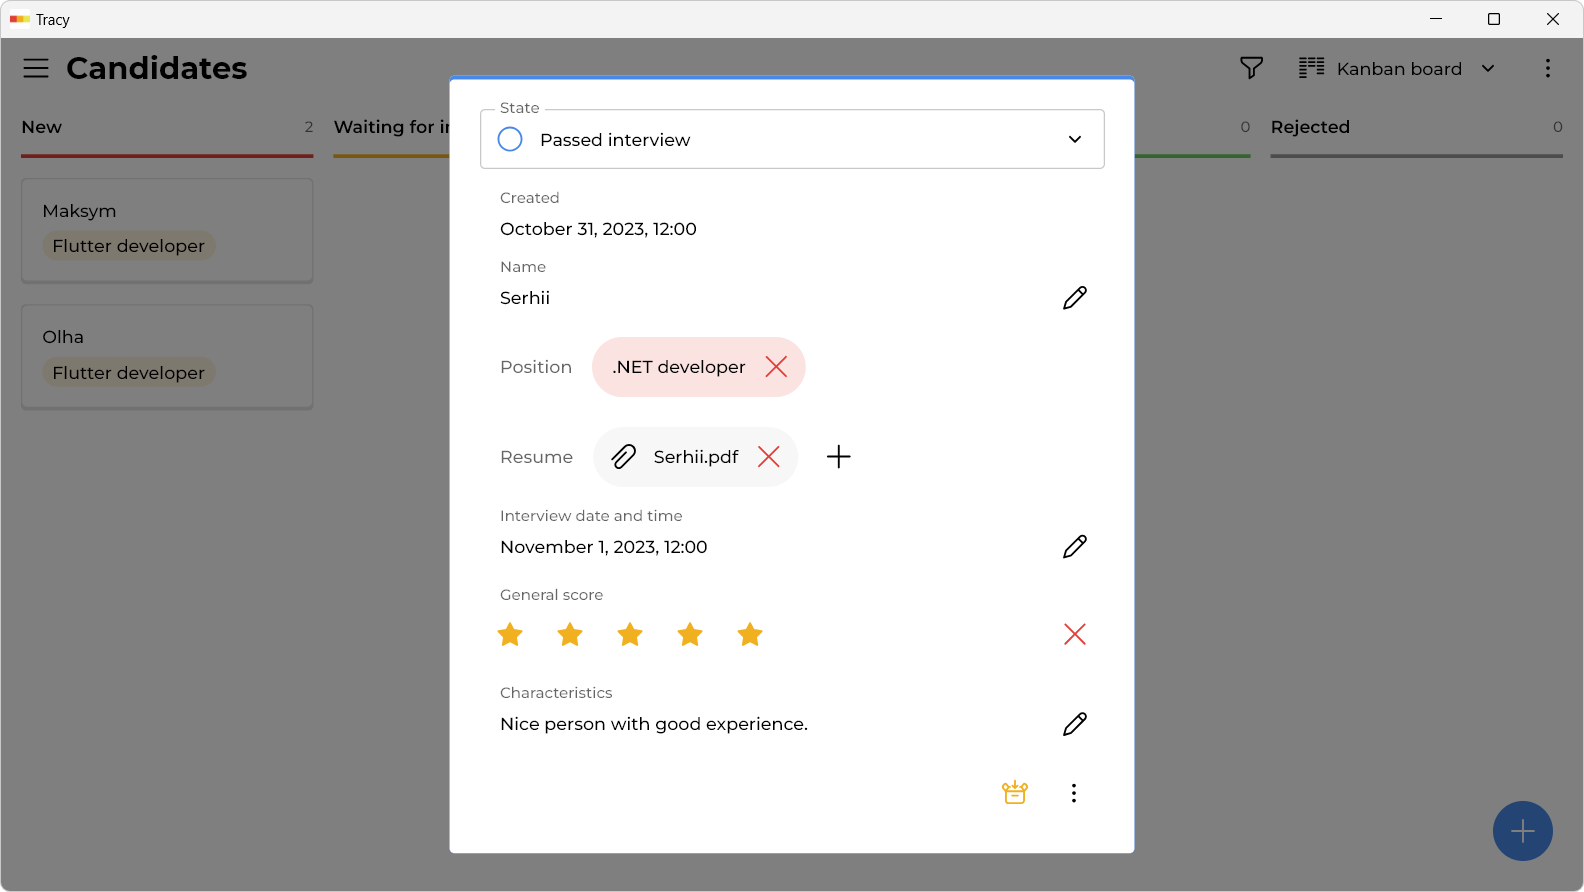
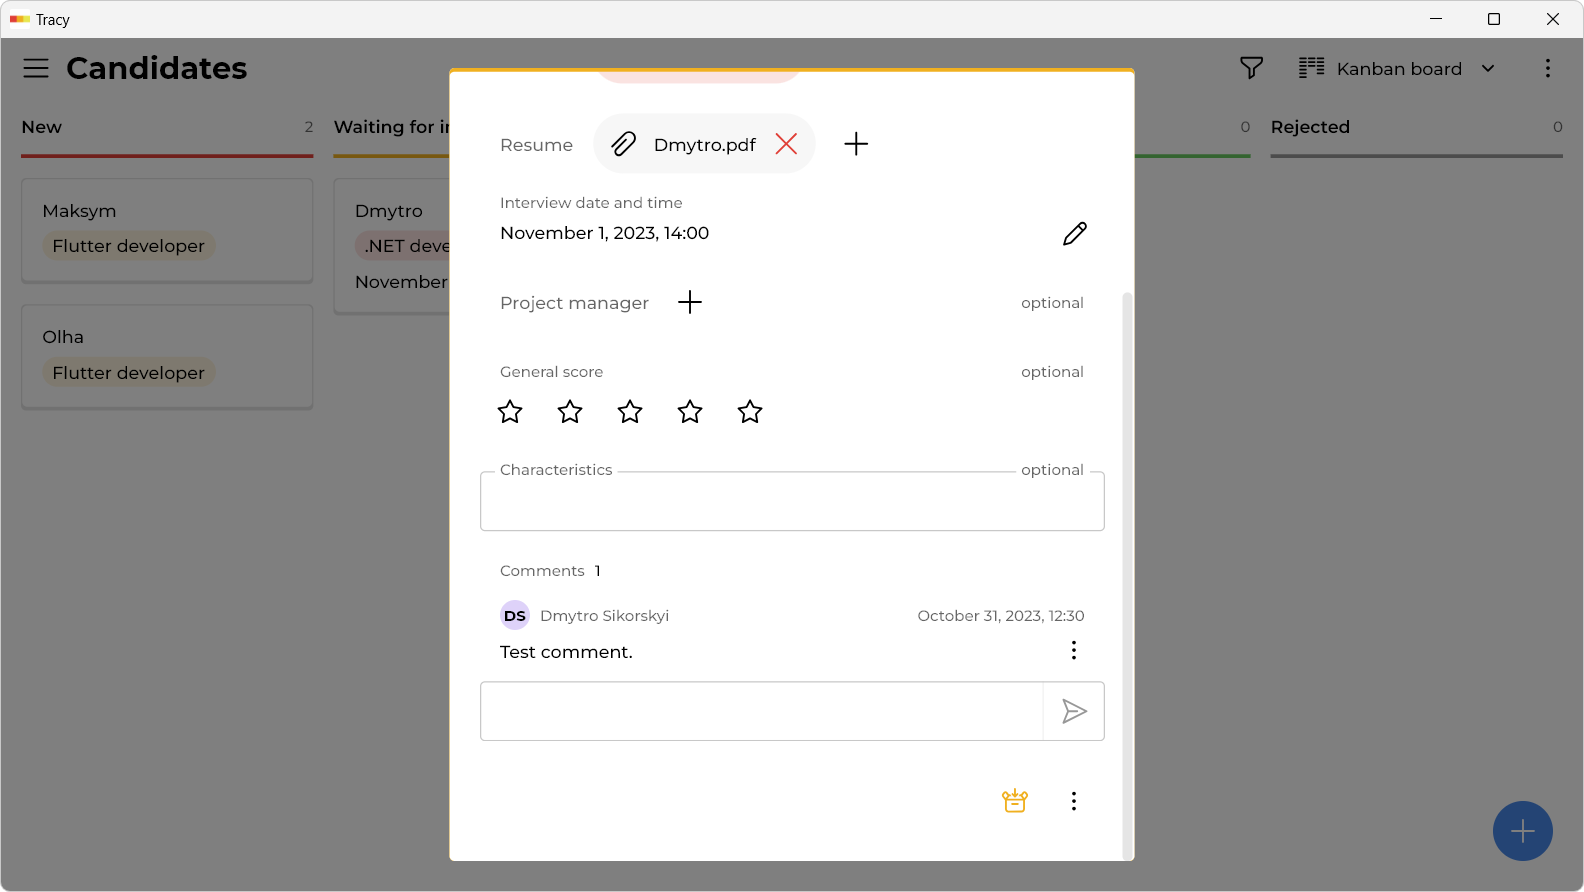
As you can see, we can currently store the following data: the state of the candidate (for example, that he has already passed the interview), his name, the vacant position, the resume file, the date and time of the interview, the project manager who will have to conduct the second stage of the interview if necessary, the general evaluation of the candidate and his characteristics.
And here the most interesting part begins. The thing is that you can change this list of fields: remove unnecessary ones and add new ones. There are over two dozen different types of fields (called properties in Tracy): you can store text, numbers, dates and times, images, files, tags, barcodes, even map locations, and more.
Now it’s even more interesting: you can flexibly configure who exactly can see or edit which properties. For example, you can hide the salary of a candidate so that no one but you can see it. Or you can give the project manager the ability to see only the name and CV of the candidates so that your impressions do not influence his decision.
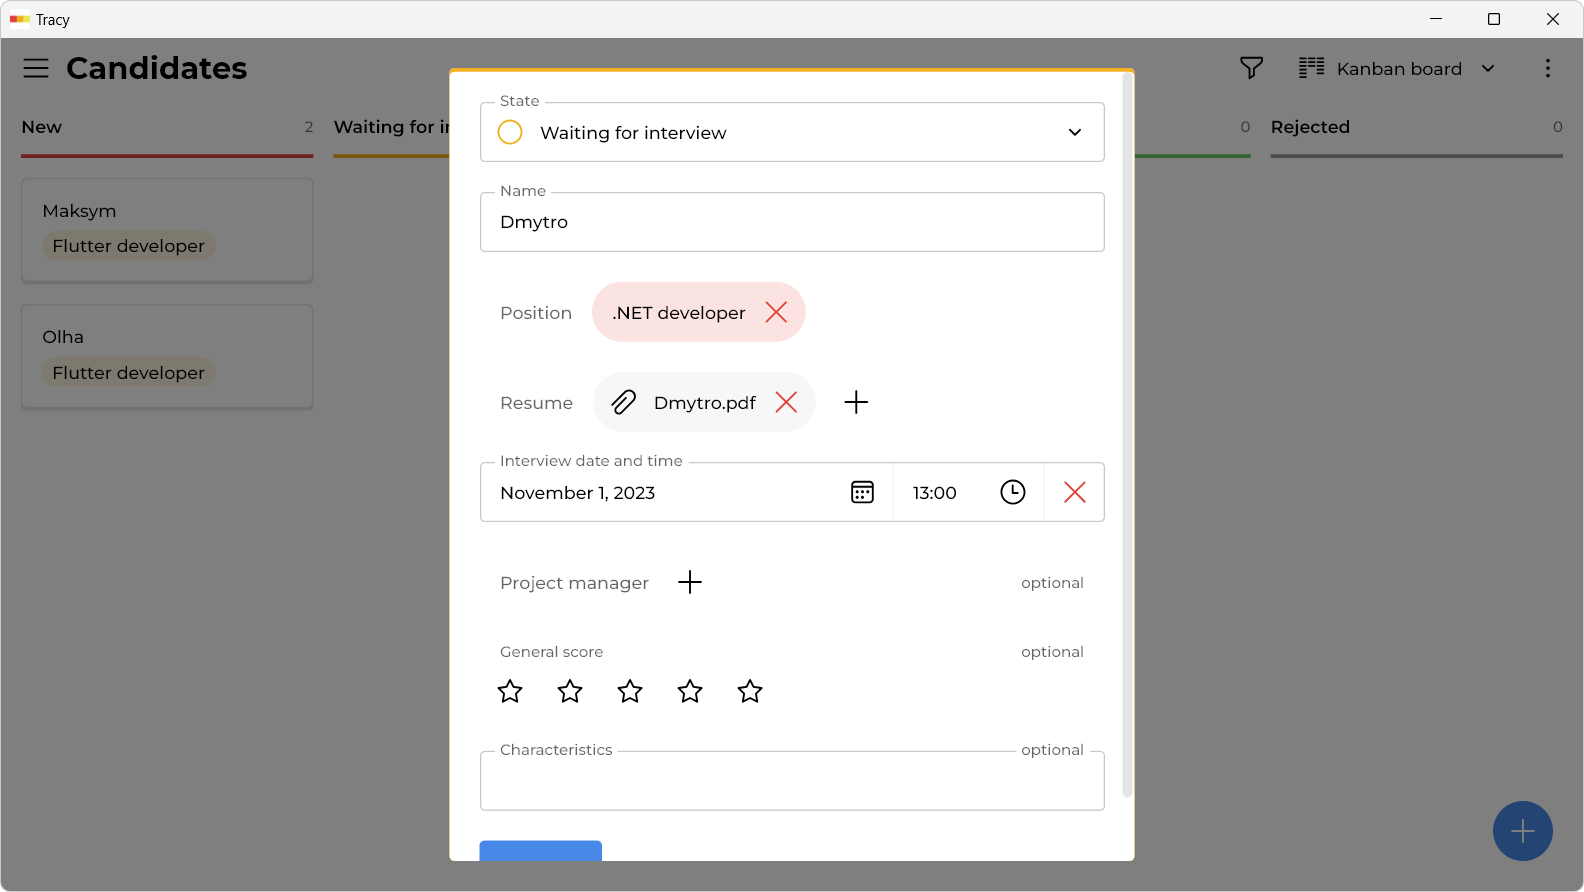
We’ll get into the settings shortly, but for now, let’s fill out the form and add our new candidate:
4. Work With Candidates
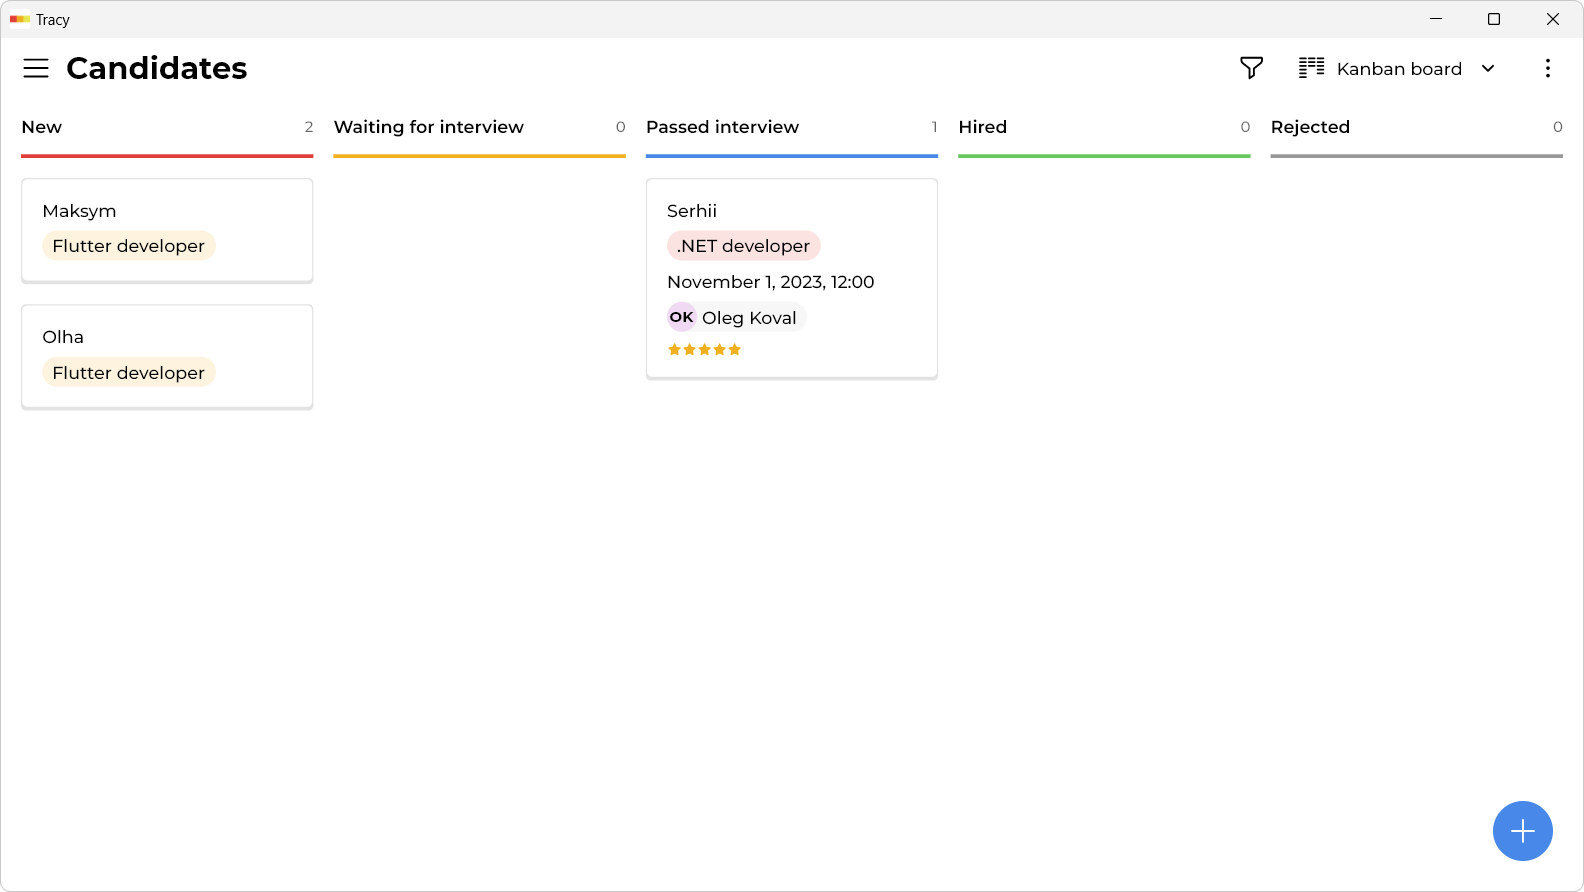
Now let’s see how exactly we can work with candidates. The mode switch for working with them is located at the top right:
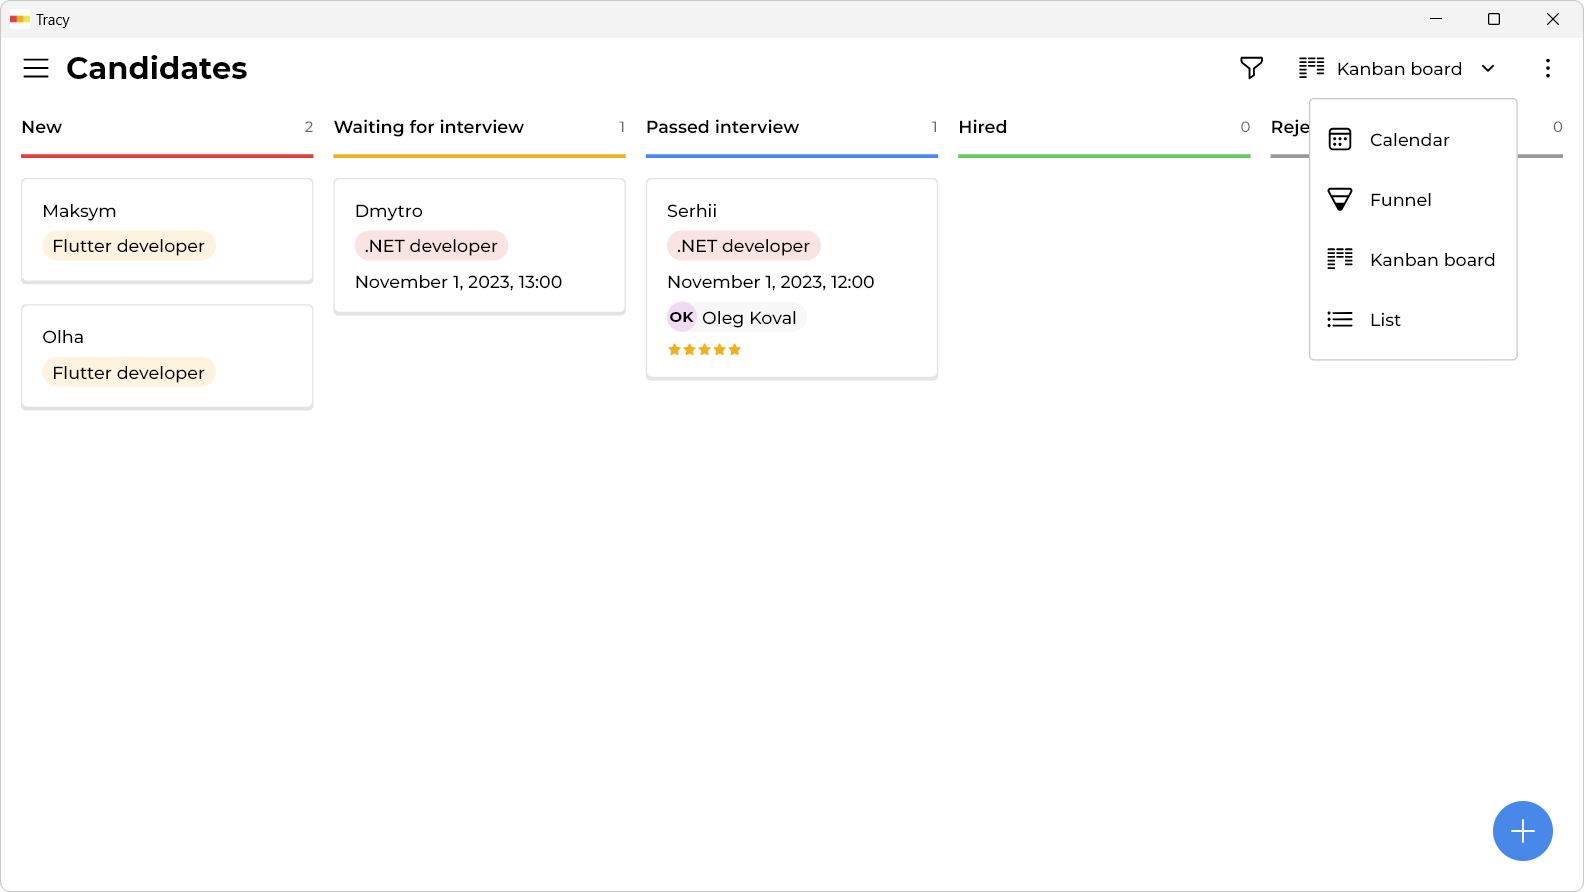
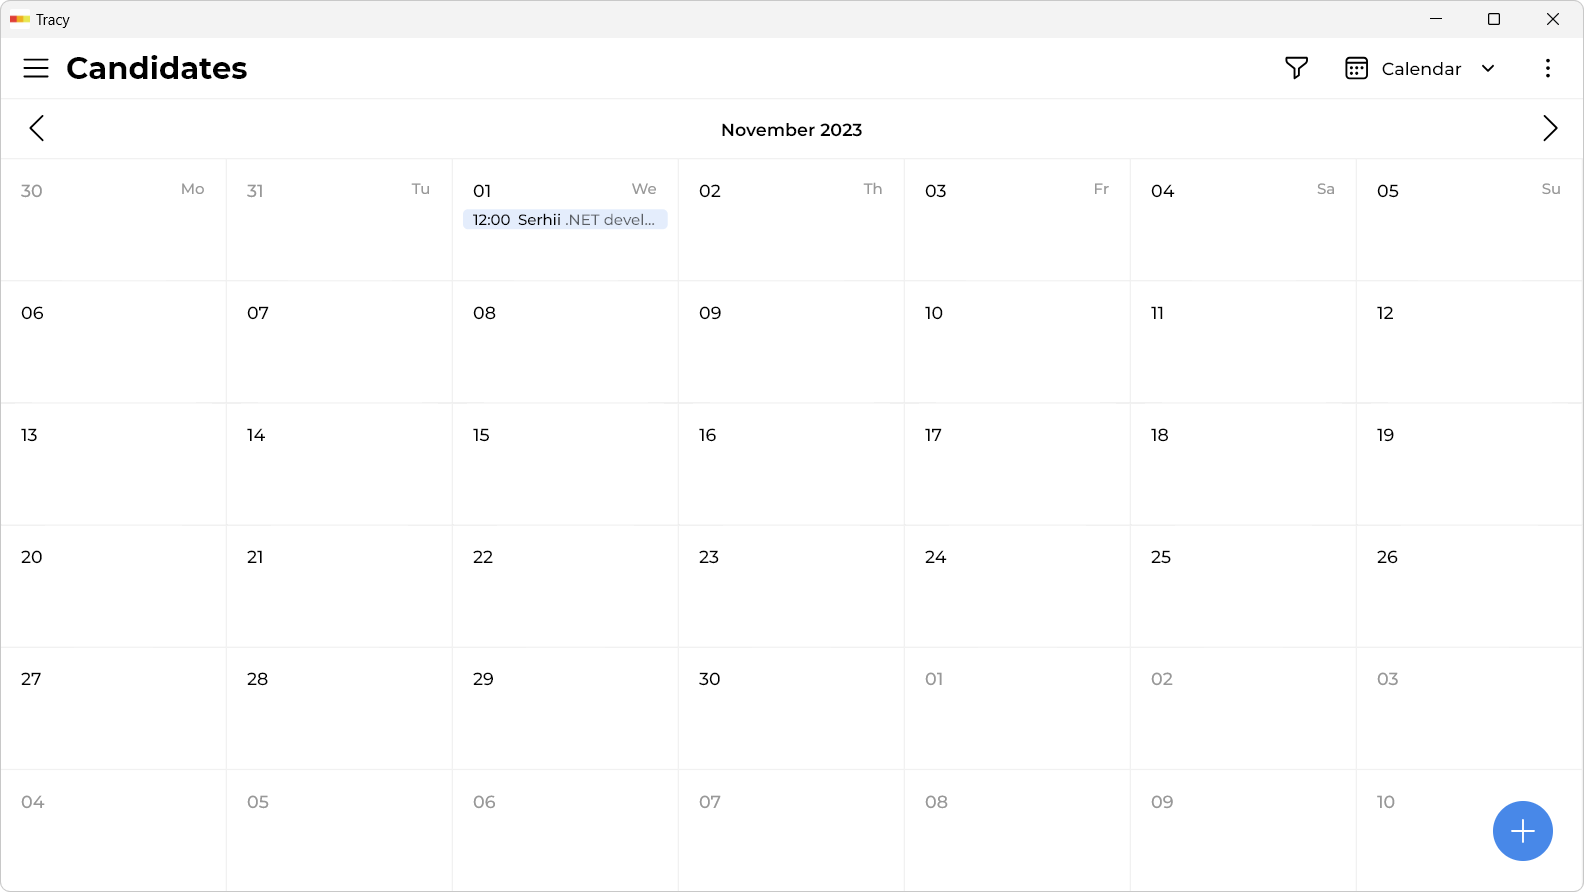
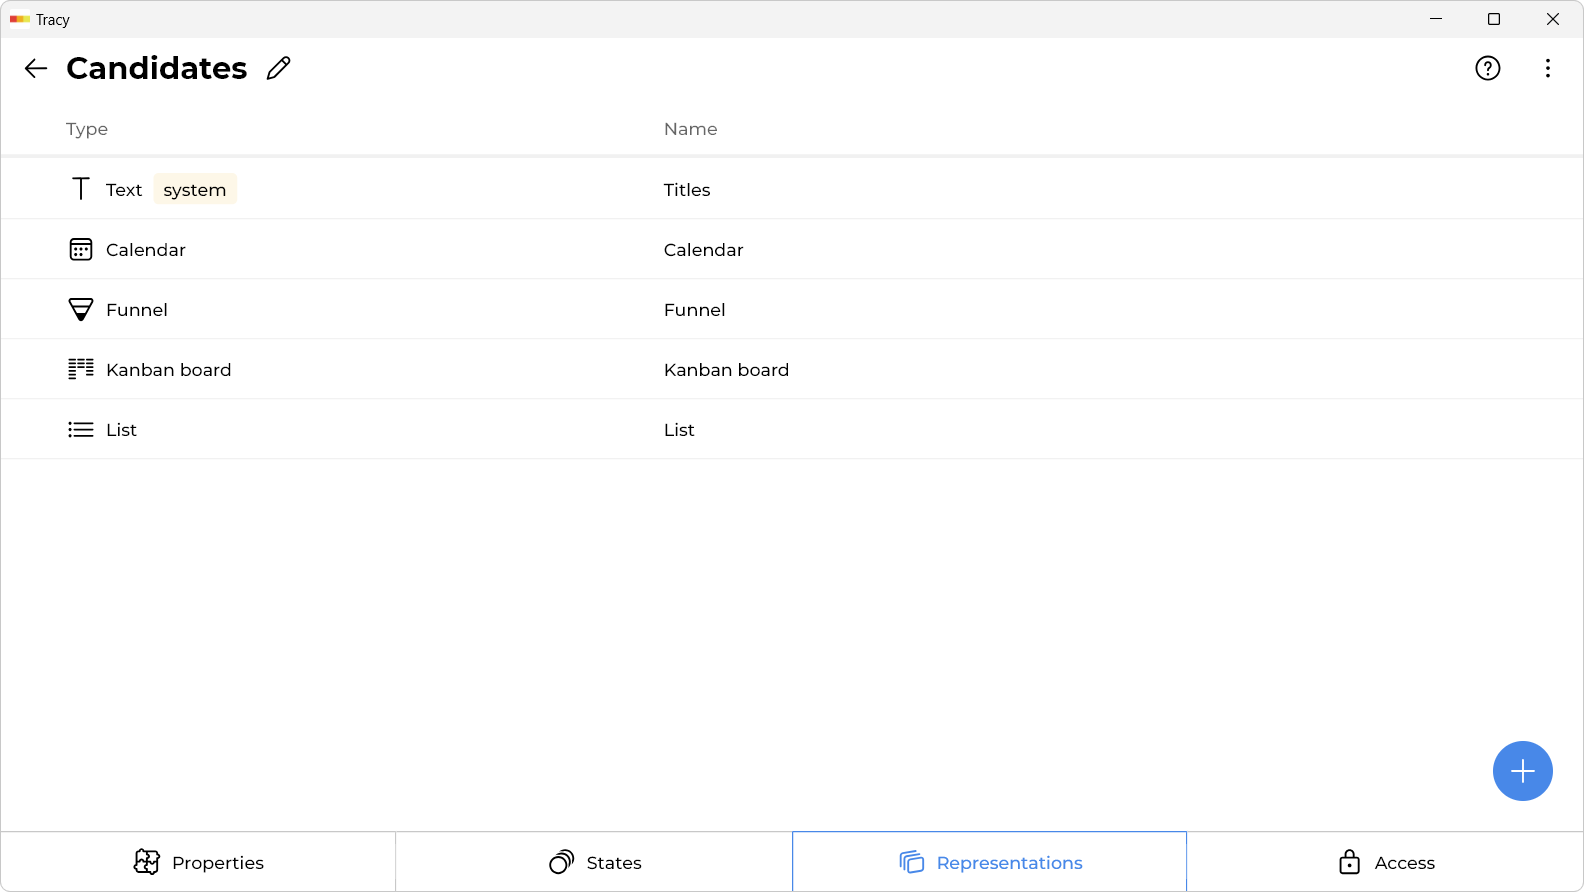
In Tracy, these modes are called representations. That is, you can interact with the same candidates (or any other data) in different ways: view them as a list, drag them from state to state on the Kanban board, plan work using the calendar, and analyze the hiring funnel. There are more types of representations, you can add the ones you need and fit your data.
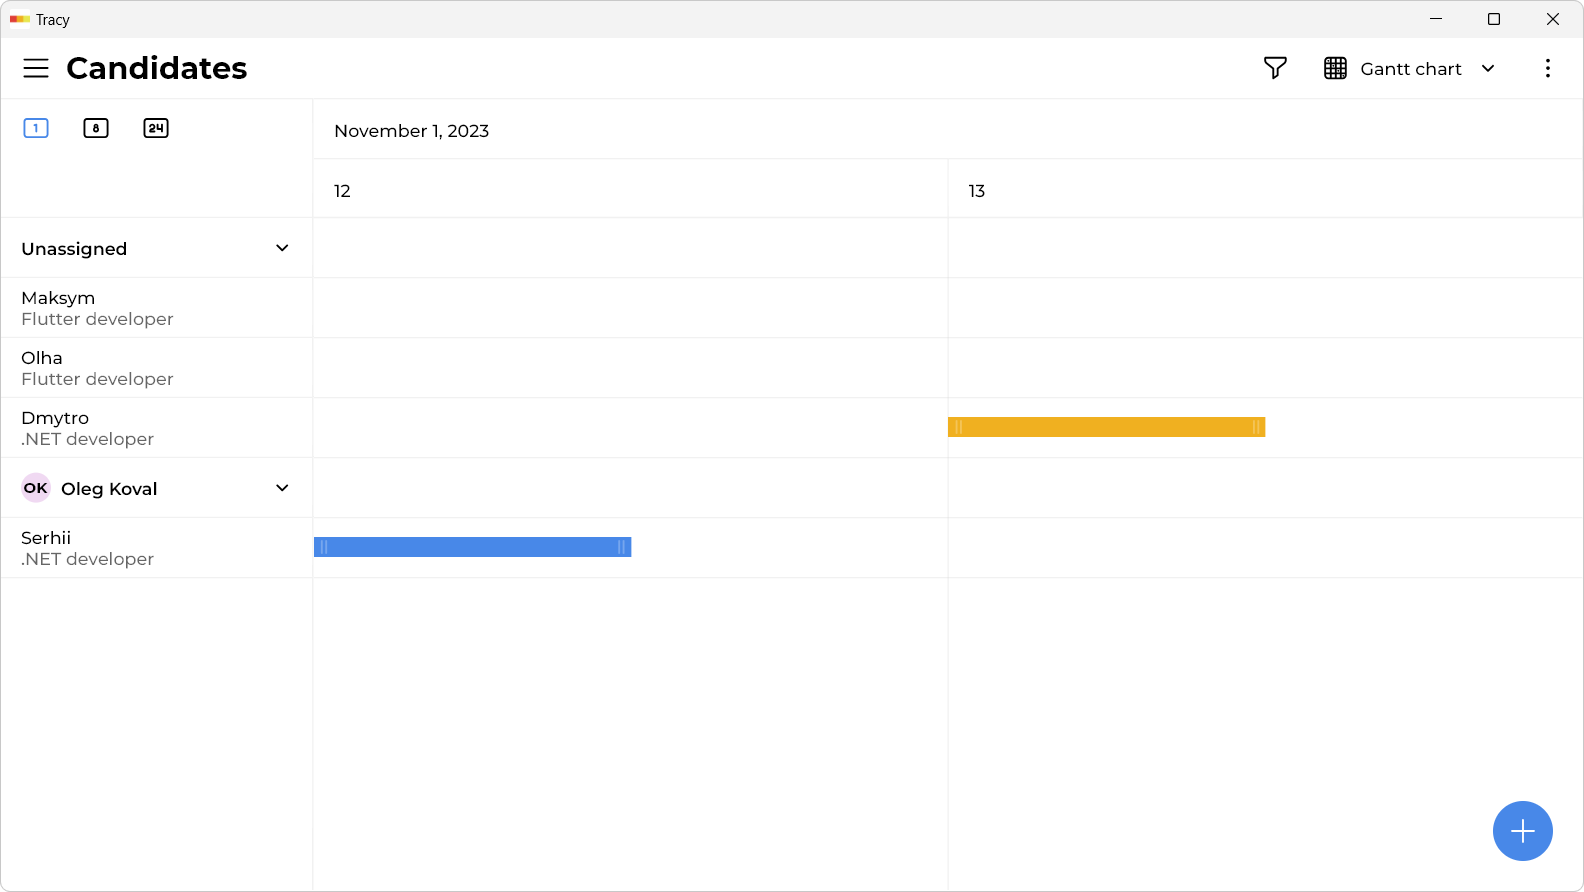
For example, you can add a Gantt chart to monitor the sequence of interviews and see where there are vacancies (for this you will also need to add another property, the duration of the interview):
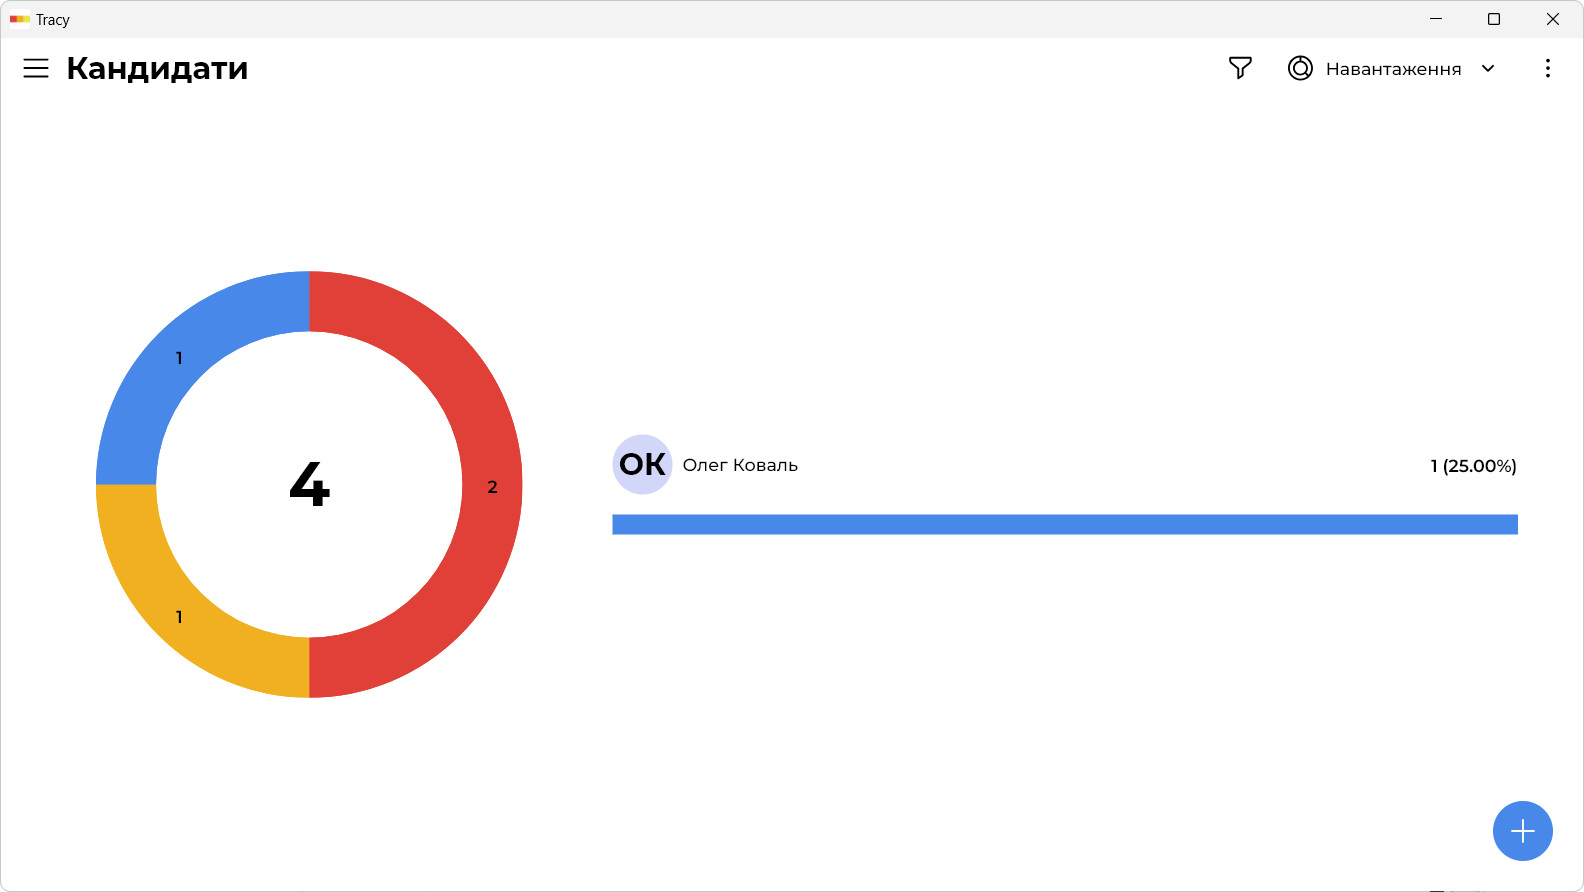
Or you can build a graph of the distribution of candidates by states and by assigned managers:
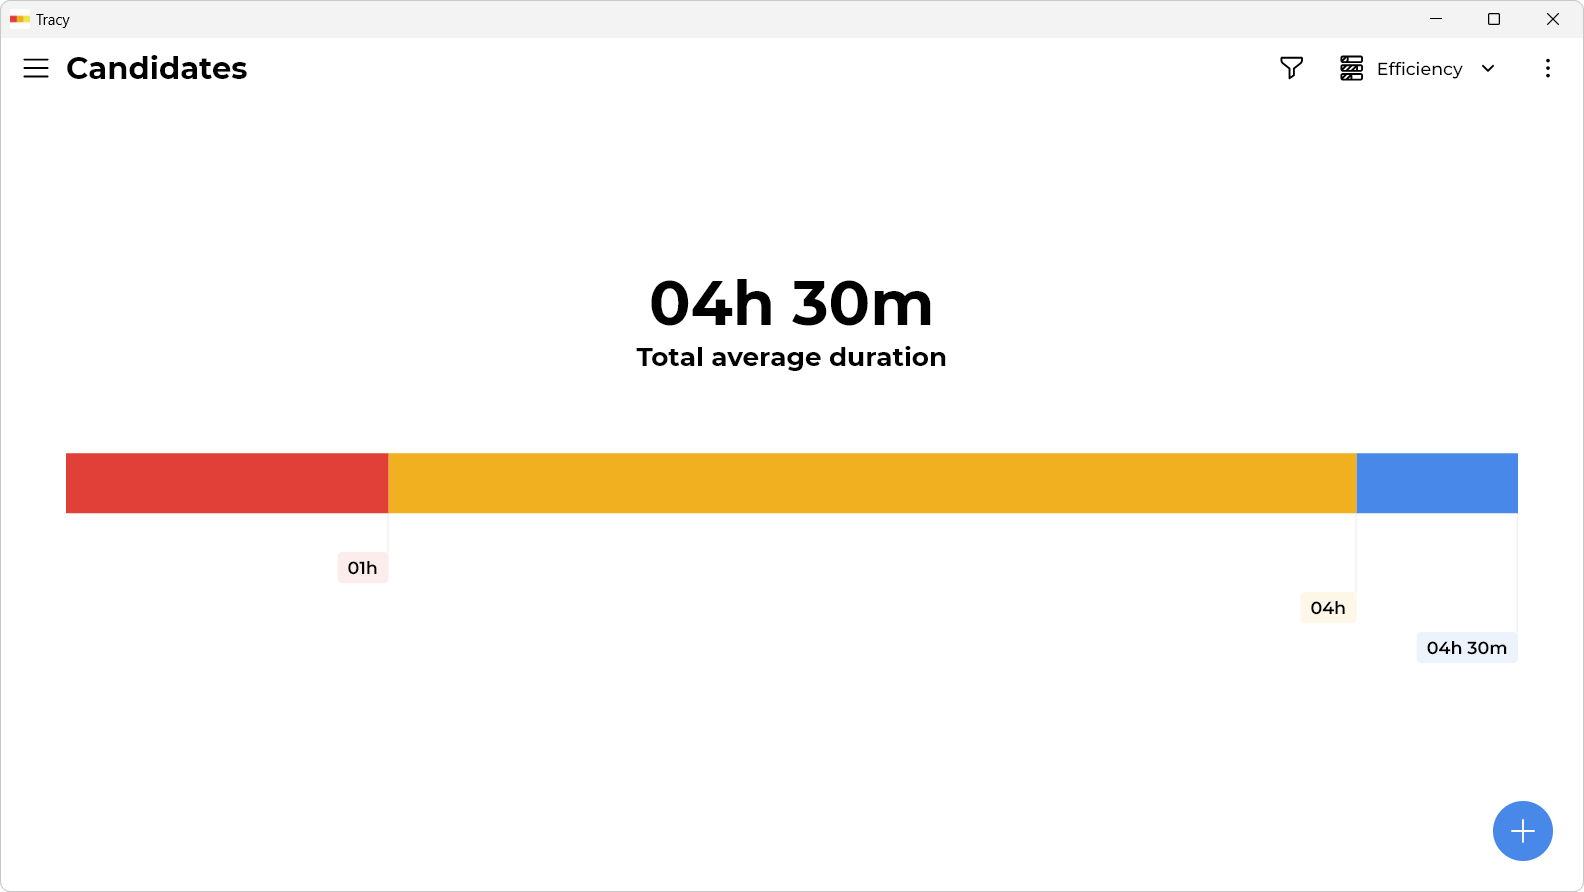
Or compare the average duration of the interview and the hiring process in general for different specialists:
5. Search
You can search for candidates either simply by text (for example, by phone number) or by the value of a specific property:
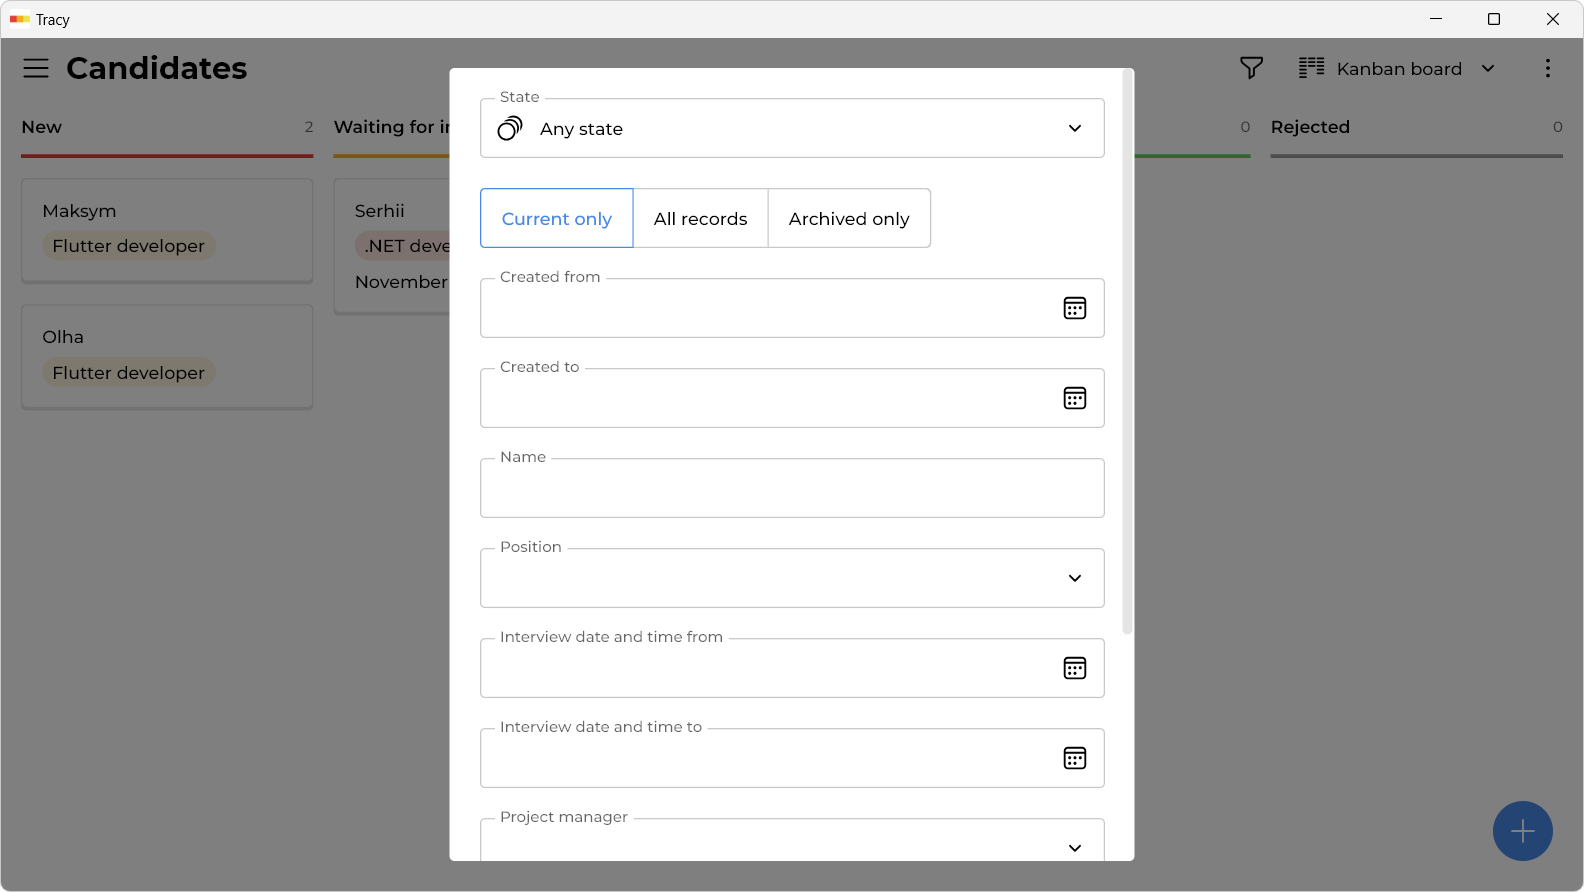
That is, you can find those you interviewed 3 weeks ago on Thursday, those who submitted feedback on a specific platform, or those you rated highly, etc.
6. Activity Log, Trash Bin, and Export
Note that actions of all the users are logged, so you can view both the overall picture and the history of a specific candidate. Let’s try to change the time of the interview, for example. This is how it looks in the log:
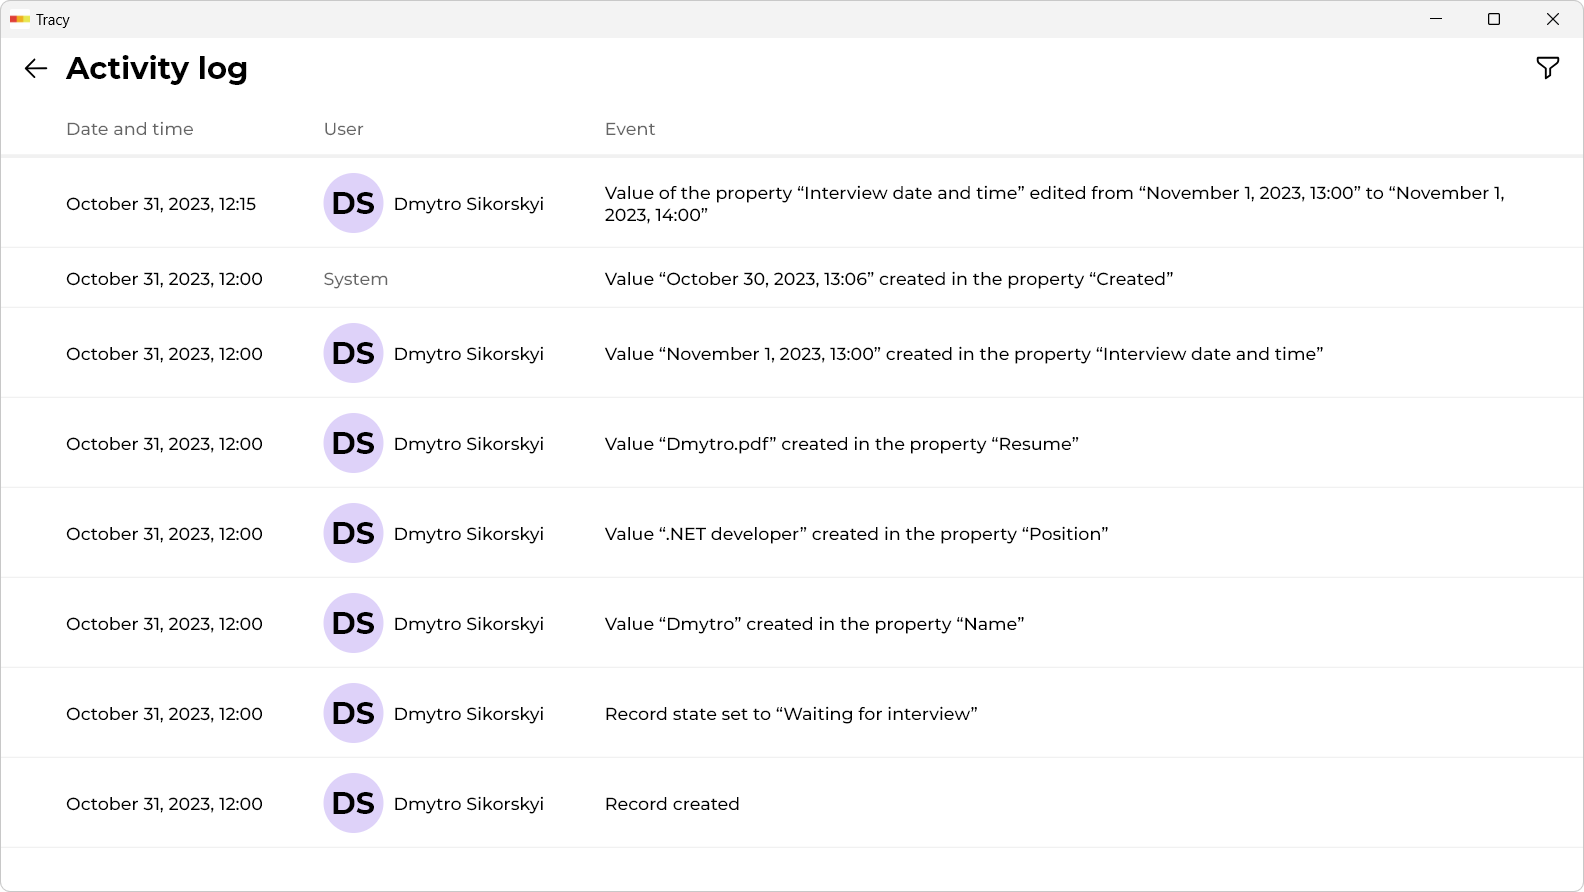
There is also a trash bin (where deleted candidates end up and from where they can be restored if needed) and export to CSV or Excel.
7. Customization
Now let’s see how you can customize Tracy to suit your needs. Open the main menu:
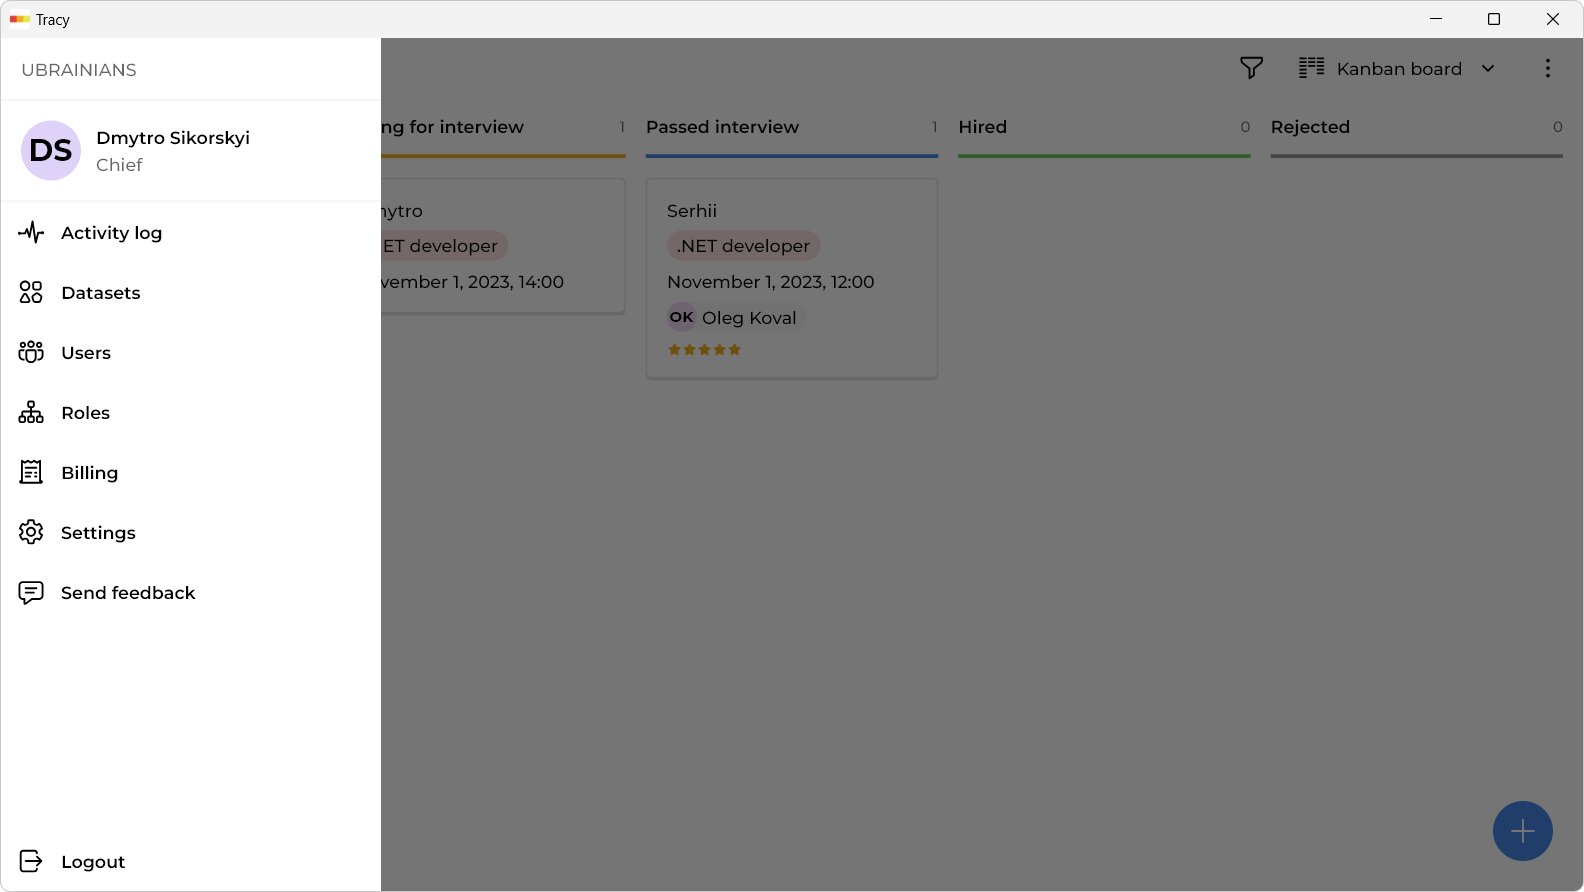
Let’s go to datasets:
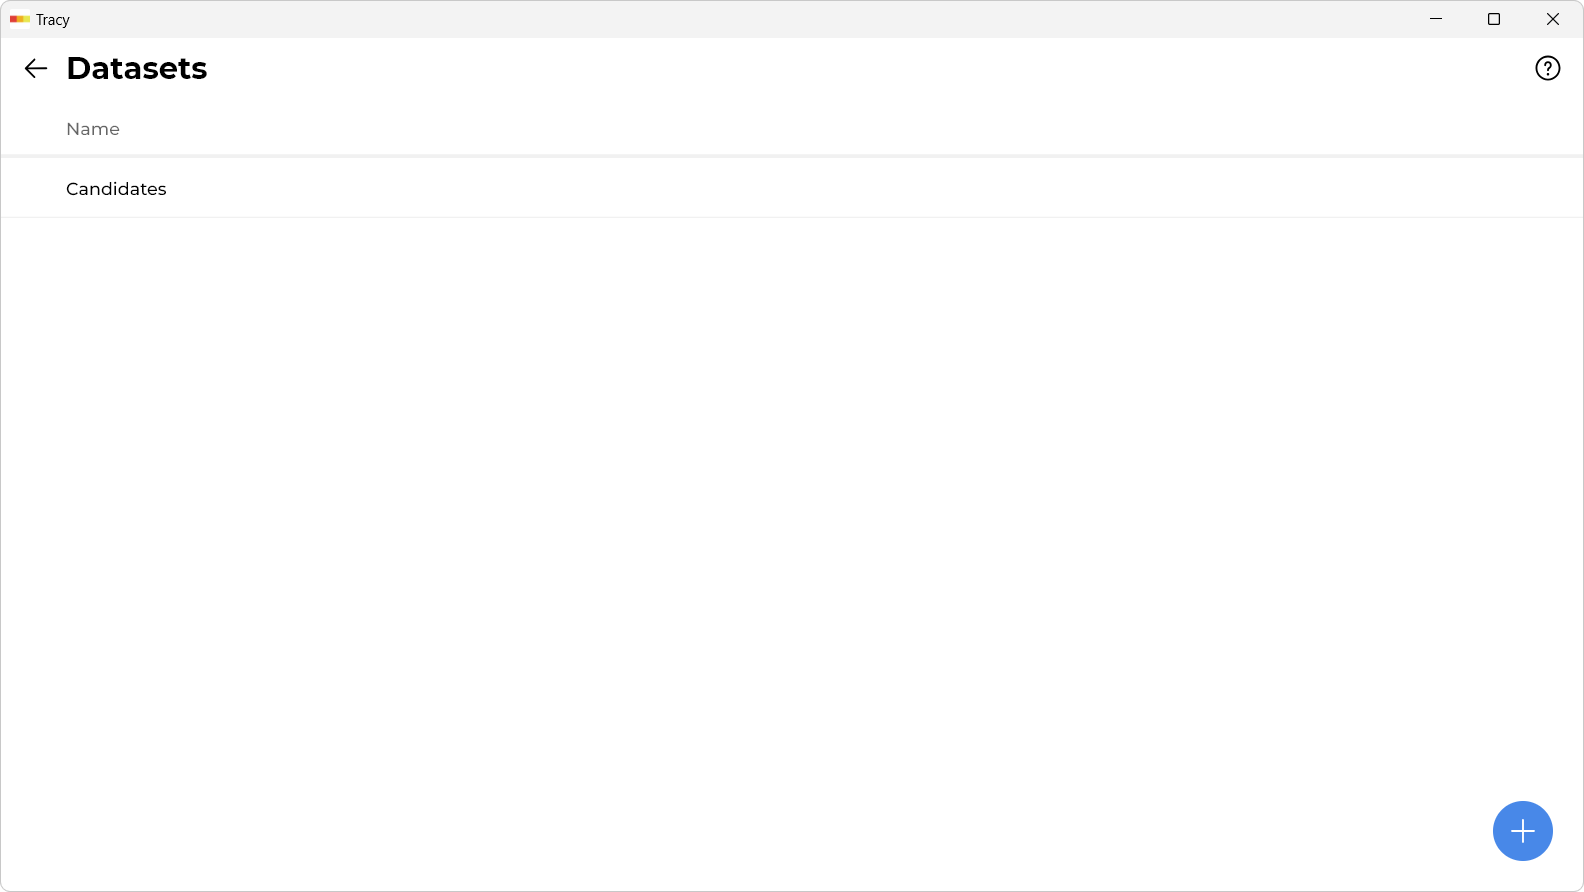
By the way, you can work not only with candidates but also save other data, which we will talk about a little later. Now we only have candidates, so we click on this line. All settings take place here:
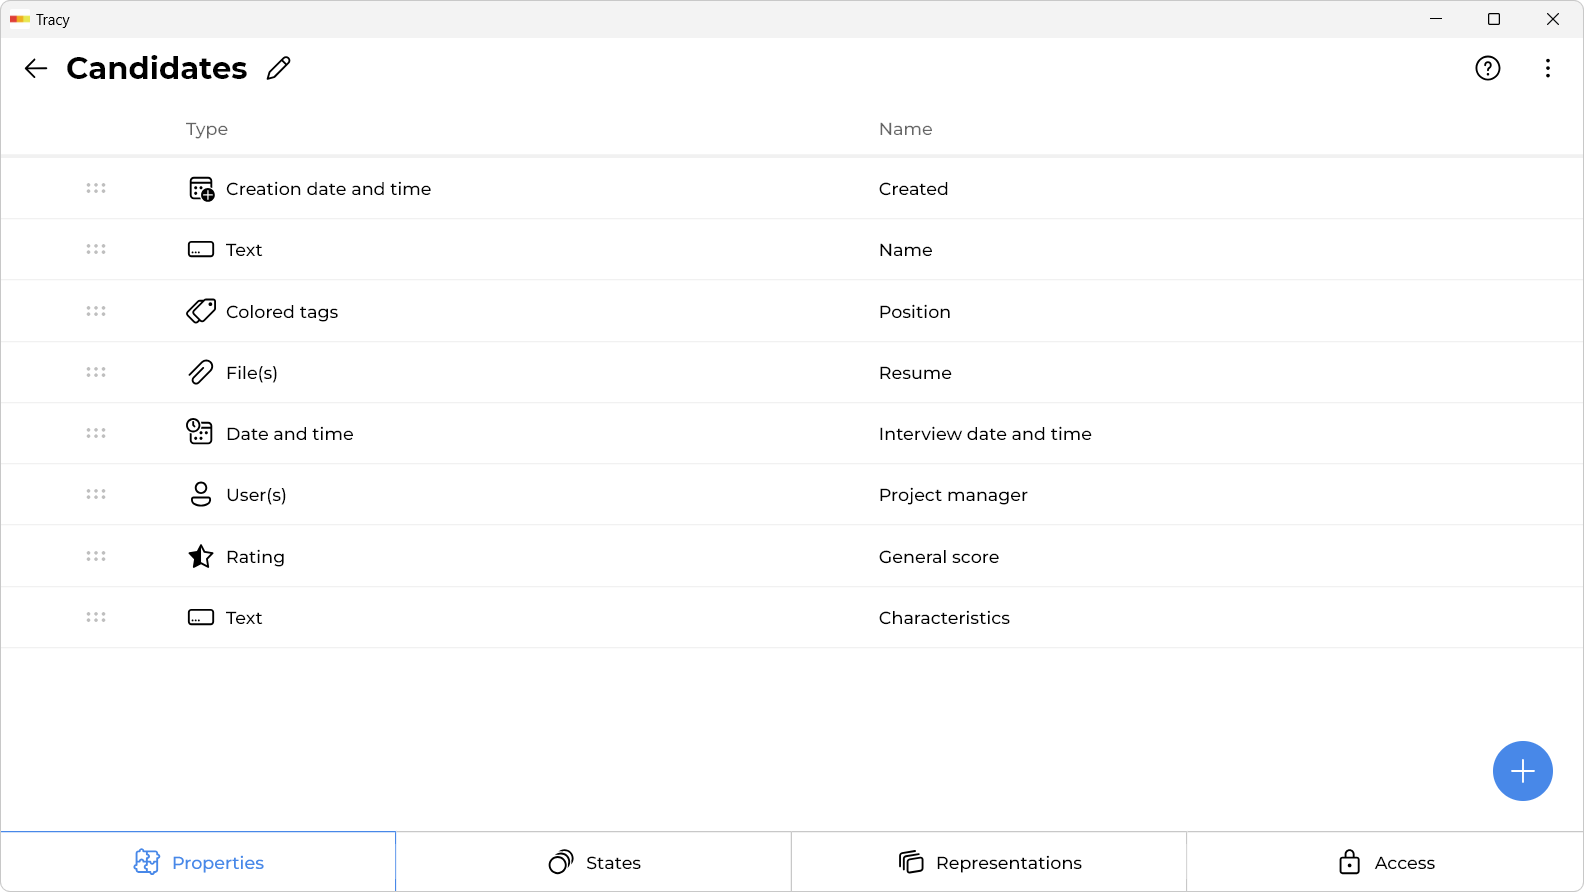
As you can see, there are 4 tabs at the bottom: “Properties”, “States”, “Representations” and “Access”.
Properties
Properties, as we said before, are what you need to store about each candidate. Let’s try to add a new property. Press the plus sign:
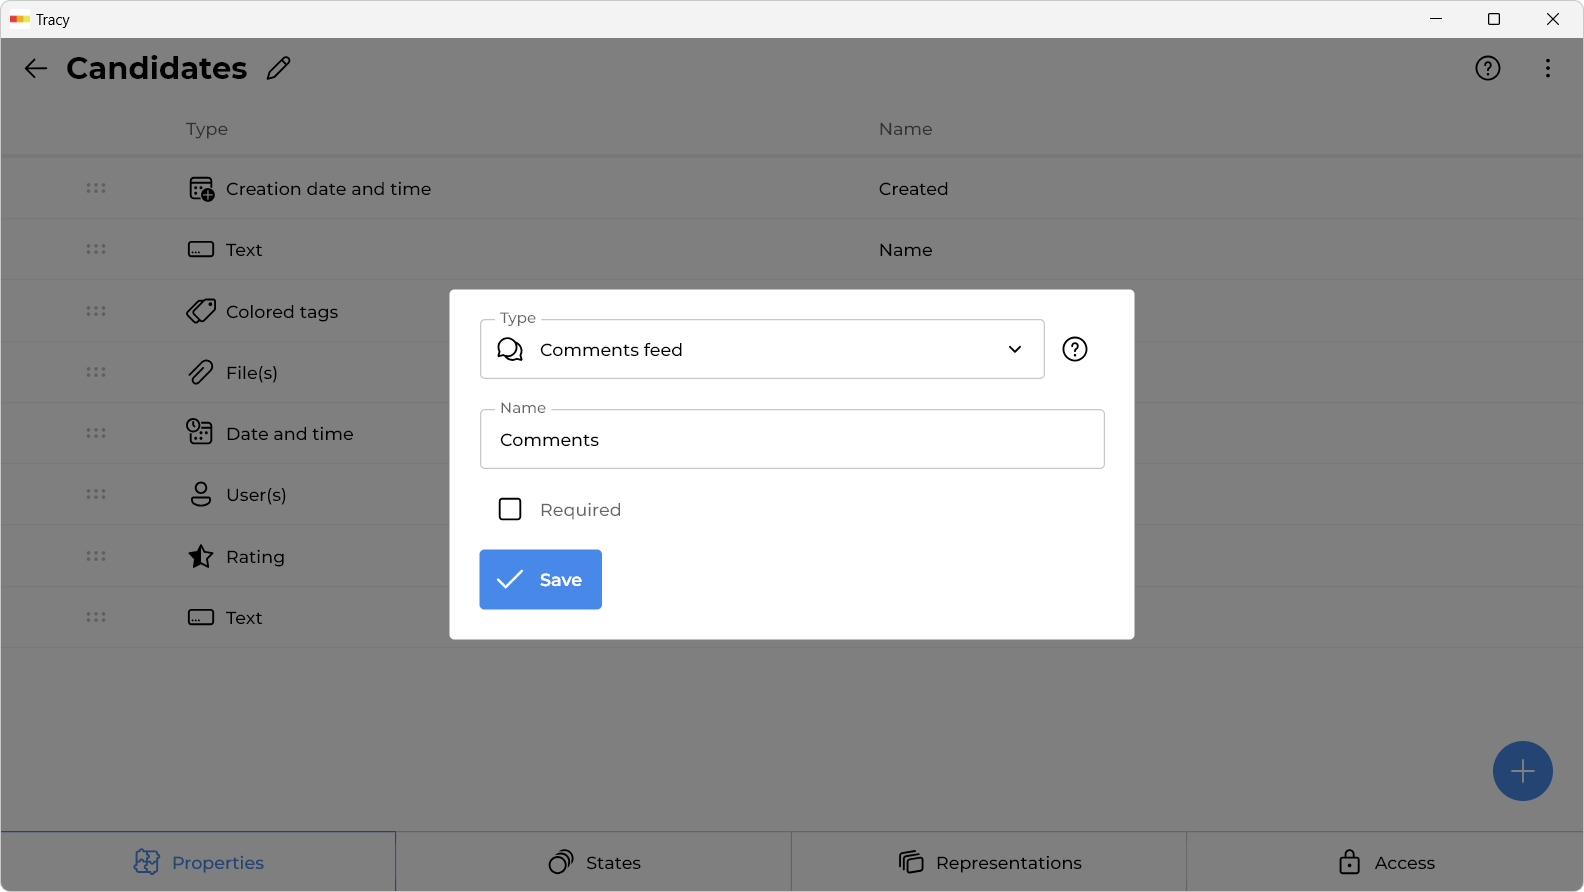
Select the type of property, for example, “Comments feed”. Enter a name that is convenient for you. For example, “Comments”. By the way, we can change the sequence of properties by dragging them. That’s it, now we can comment on our candidates:
States
Let’s go back to the settings. The next tab is “States”:
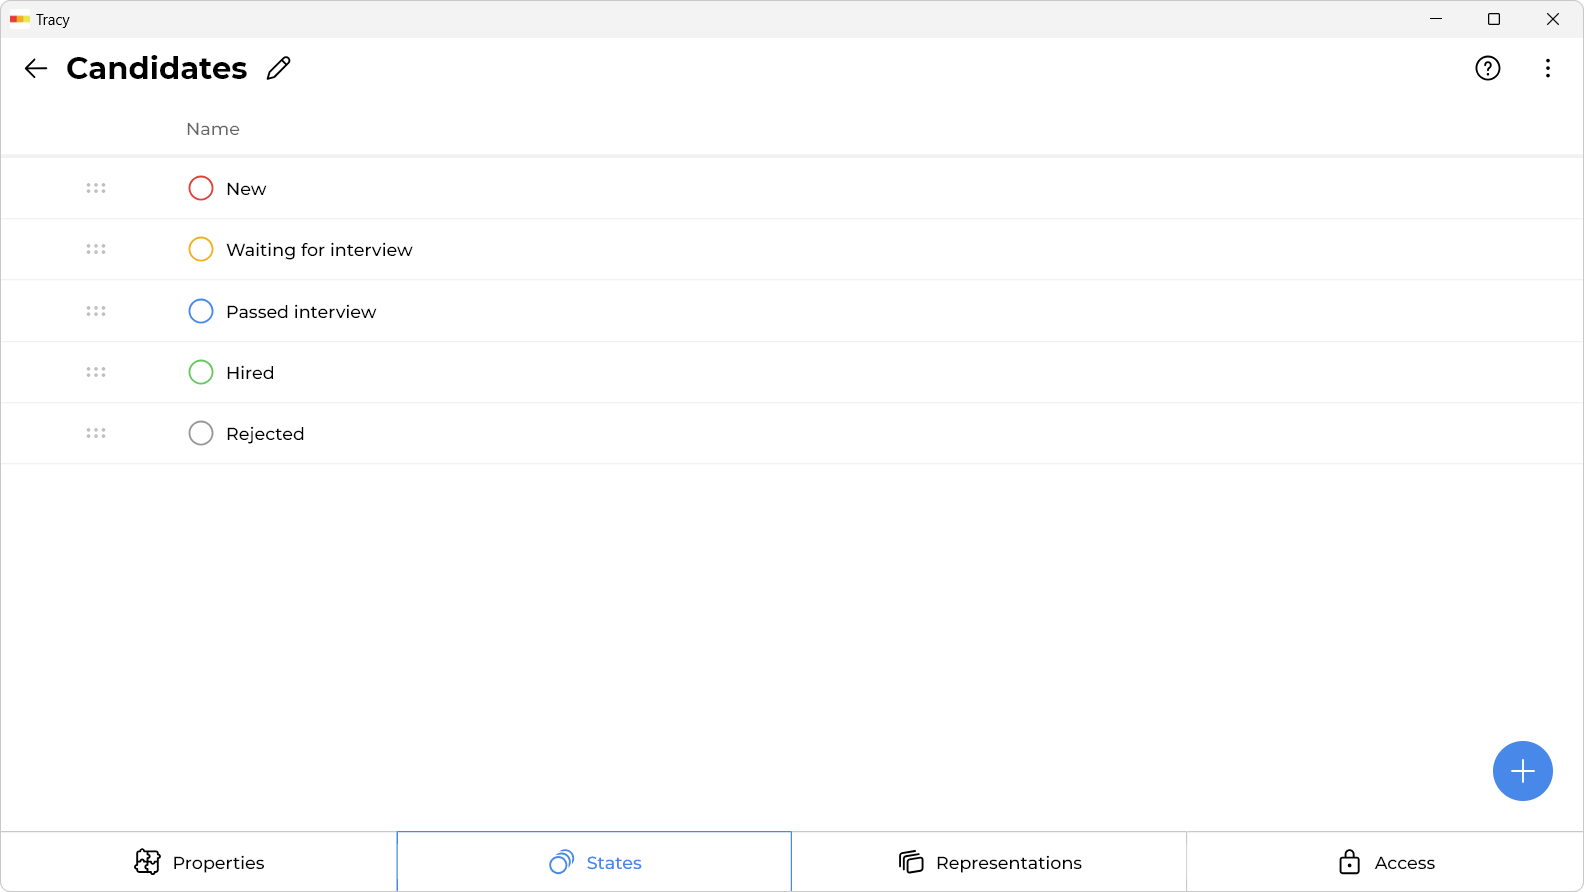
States is a general word; in our case, it stands for the stages of working with candidates, that is, the stages of interviews. You can add as many as you need.
Representations
The “Representations” tab allows you to configure how you will work with candidates and view them:
For example, consider how you can build a workload chart for your colleagues. Press the plus sign to create a new representation:
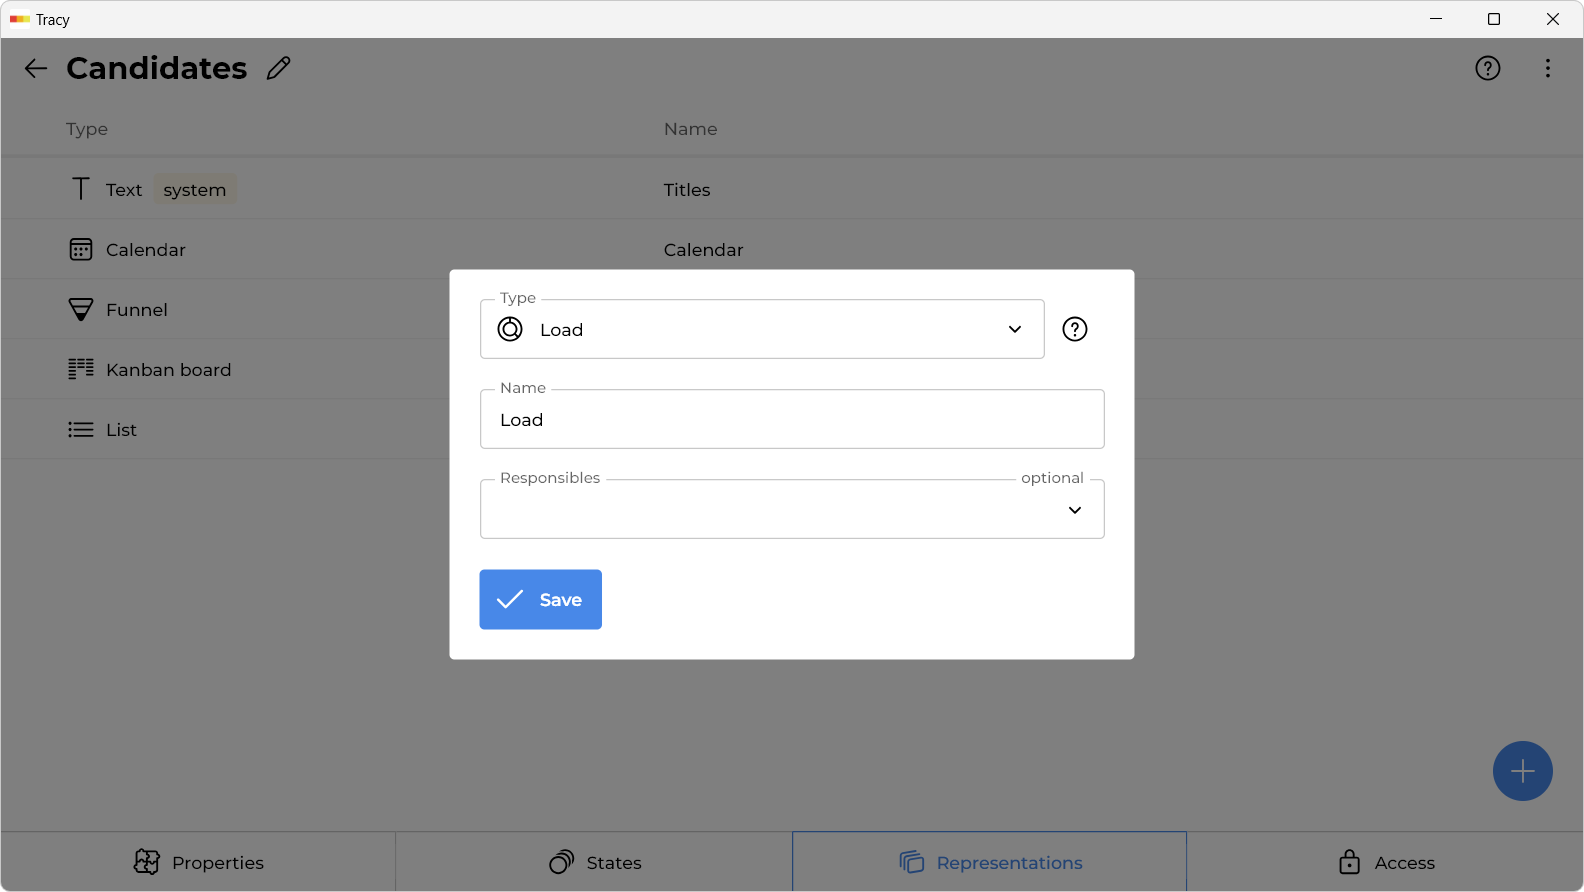
Select the “Load” type, and enter any convenient name for you. In the “Responsible” field, you can select “Project manager”, but this is not mandatory, because we do not yet have assigned users of other roles. That’s all, now we can see exactly how the candidates are distributed by state and responsible:

By the way, the data is updated in real-time, so if someone adds a new candidate, or changes something in an existing one, it will immediately be reflected for everyone who has Tracy open.
Access
We return to the settings again, now to the “Access” tab. Here you can specify who (by selecting a user role from the top left), when (in what state) and what can be seen or edited, separately for each property:
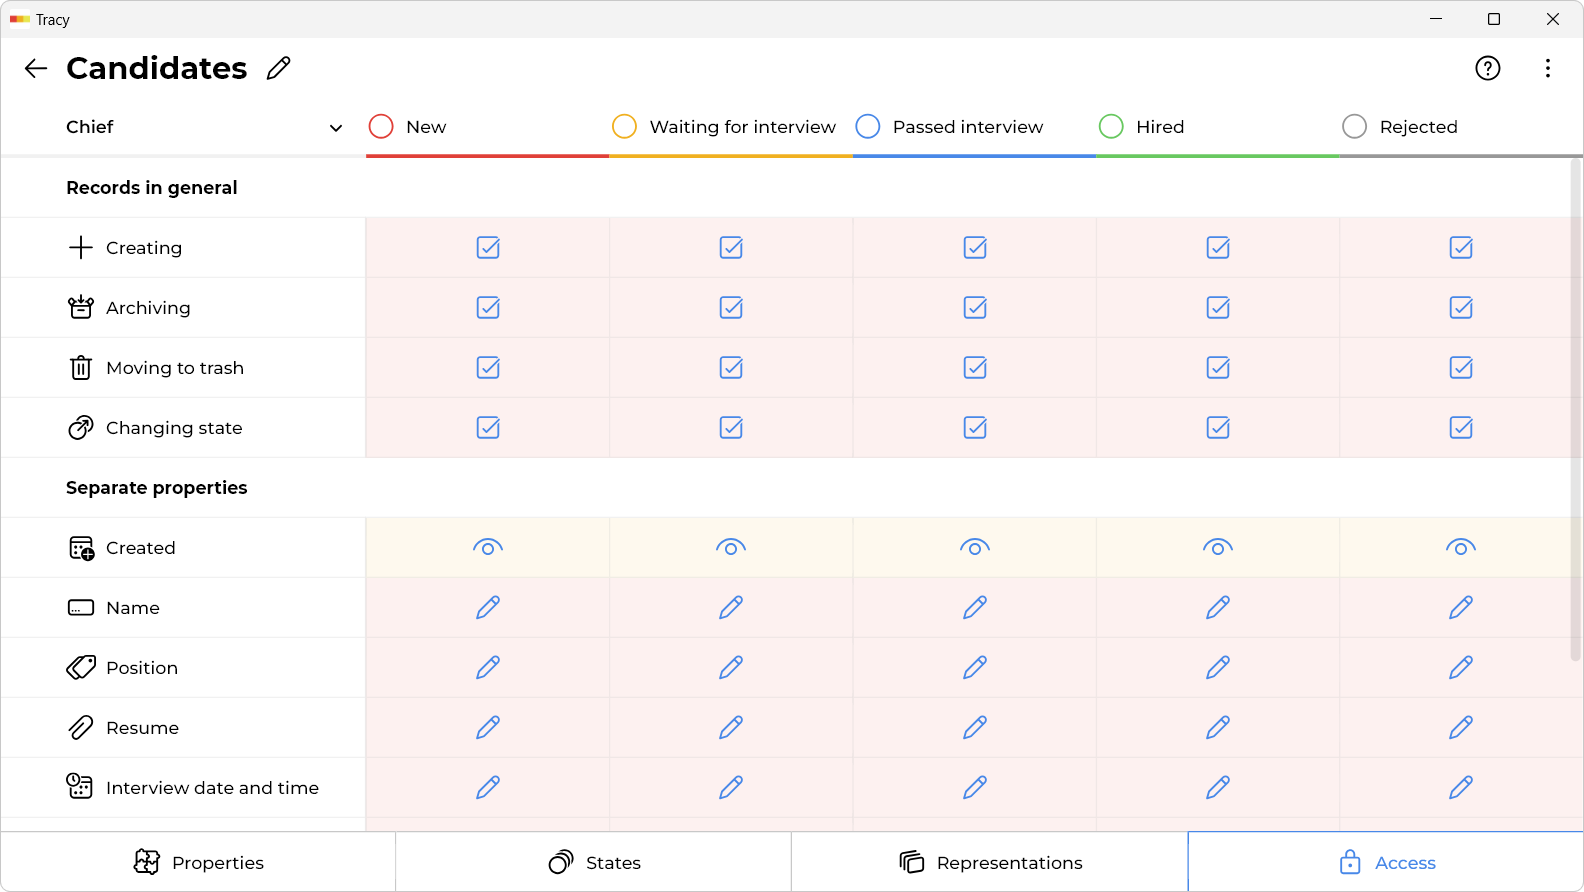
After registration, you have the role “Chief”, so you can edit all data in all states (for your role, there is a pencil set everywhere). We switch to project managers and see that they can edit only 2 properties (general assessment and characteristic), and only if they are assigned to the corresponding candidate. And they can only see other properties:
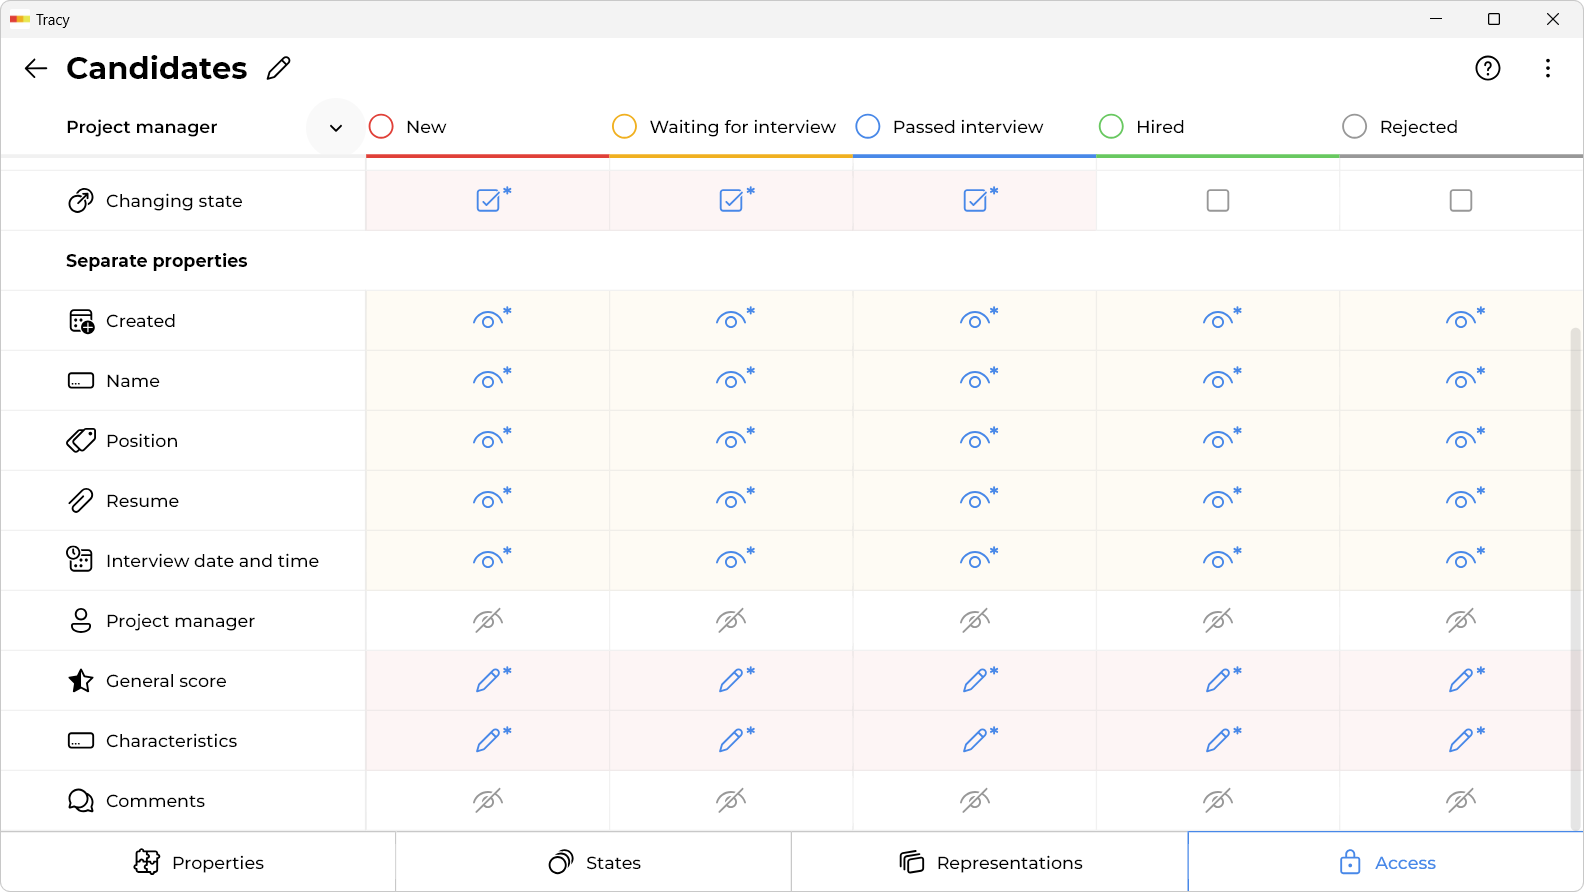
That is, the project manager runs Tracy and sees there only those candidates for whom you assigned him, can conduct interviews and record his impressions. At the same time, you can see information about all the candidates and can edit all of it. Project managers are just an example. Instead of project managers, you can configure access for employees of different departments, for example. That is, there can be many roles, and access is configured separately for each of them.
8. Work With Other Workflows
Of course, you can use Tracy for more than just HR purposes. You can add other datasets (for example, “Customers”, “Orders”, “Requests”, etc.), with other properties, add roles and users. You can even combine data, for example, link customers to orders.
Please write to us if you have any questions. We will be happy to help you get a tool for organizing your work.
FAQ
What tools do HR professionals use?
HR specialists use different tools depending on their tasks. For recruitment, popular platforms include LinkedIn, Workable, Recruitee, and CleverStaff. For HR management, BambooHR, Zoho People, Personio, as well as Excel or Google Sheets are often used. More and more teams are turning to universal platforms like Tracy to manage candidate databases, schedule interviews, and coordinate the team. The choice depends on the company size, budget, and the complexity of internal processes.
What can be automated in HR?
HR teams can automate email campaigns, onboarding, collecting resumes from forms, interview scheduling, and report generation. Automation also covers candidate status updates, document checks, and deadline reminders. This significantly reduces routine work and human error. With more time freed up, HR professionals can focus on analysis and communication. Platforms like Tracy help set up automations tailored to the team's needs.
How does Tracy simplify candidate data storage?
Tracy allows users to create detailed candidate cards with contact info, CVs, comments, and hiring status. All data is stored centrally, not scattered across emails or chats. Each candidate has a full interaction history that’s easy to access. Information visibility can be restricted or shared with specific teammates. This makes the process secure, convenient, and eliminates duplication.
Can interviews be scheduled in Tracy?
Yes, Tracy includes a calendar feature where interviews can be scheduled with assigned times and responsible team members. You can attach video call links or office addresses directly to the task. The system sends reminders to prevent missed meetings. Each candidate’s stage in the process is clearly visible. This makes it easier to manage multiple hiring pipelines simultaneously.
How can I set access permissions for candidate data?
Tracy allows you to create a separate board or project for recruitment and define who has access. You can also manage roles: some people can see only limited information, others the full candidate profile. This is helpful when people with different responsibilities are involved. For example, a manager may only see finalists, while HR sees all applicants. Permissions are easy to set and change at any time.
How can hiring progress be tracked in Tracy?
Tracy lets you build a visual board with stages like “Review”, “Interview”, “Offer”, and “Hired”. Candidates move across stages as cards, giving a clear overview of their progress. Analytics dashboards are also available, showing the number of applications, average time to hire, and more. This helps assess hiring efficiency. All data updates in real time.
Can I add custom fields to candidate profiles?
Yes, Tracy allows you to add any custom fields — such as expected salary, source of application, or specific skills. This lets you tailor the system to your team’s needs. You can easily filter and sort based on any field. Information stays structured without extra tabs or manual searches. This streamlines decision-making and analysis.
How does Tracy support hiring process analytics?
Tracy tracks every activity within a project, so you can see how long each stage takes and where candidates drop off. Visual dashboards show real-time statistics that are easy to configure. This helps identify bottlenecks and improve workflows. You can also compare hiring performance across roles or time periods. The analytics are based on actual data, not assumptions.
Is Tracy suitable for teams with multiple HR specialists?
Yes, Tracy is great for team use, allowing clear task division and visibility into responsibilities. Each HR professional can manage their own candidates or collaborate on shared pools. All updates are synced in real time. This eliminates duplication or information loss. The system is designed for seamless teamwork without unnecessary red tape.
 Dmytro Sikorskyi