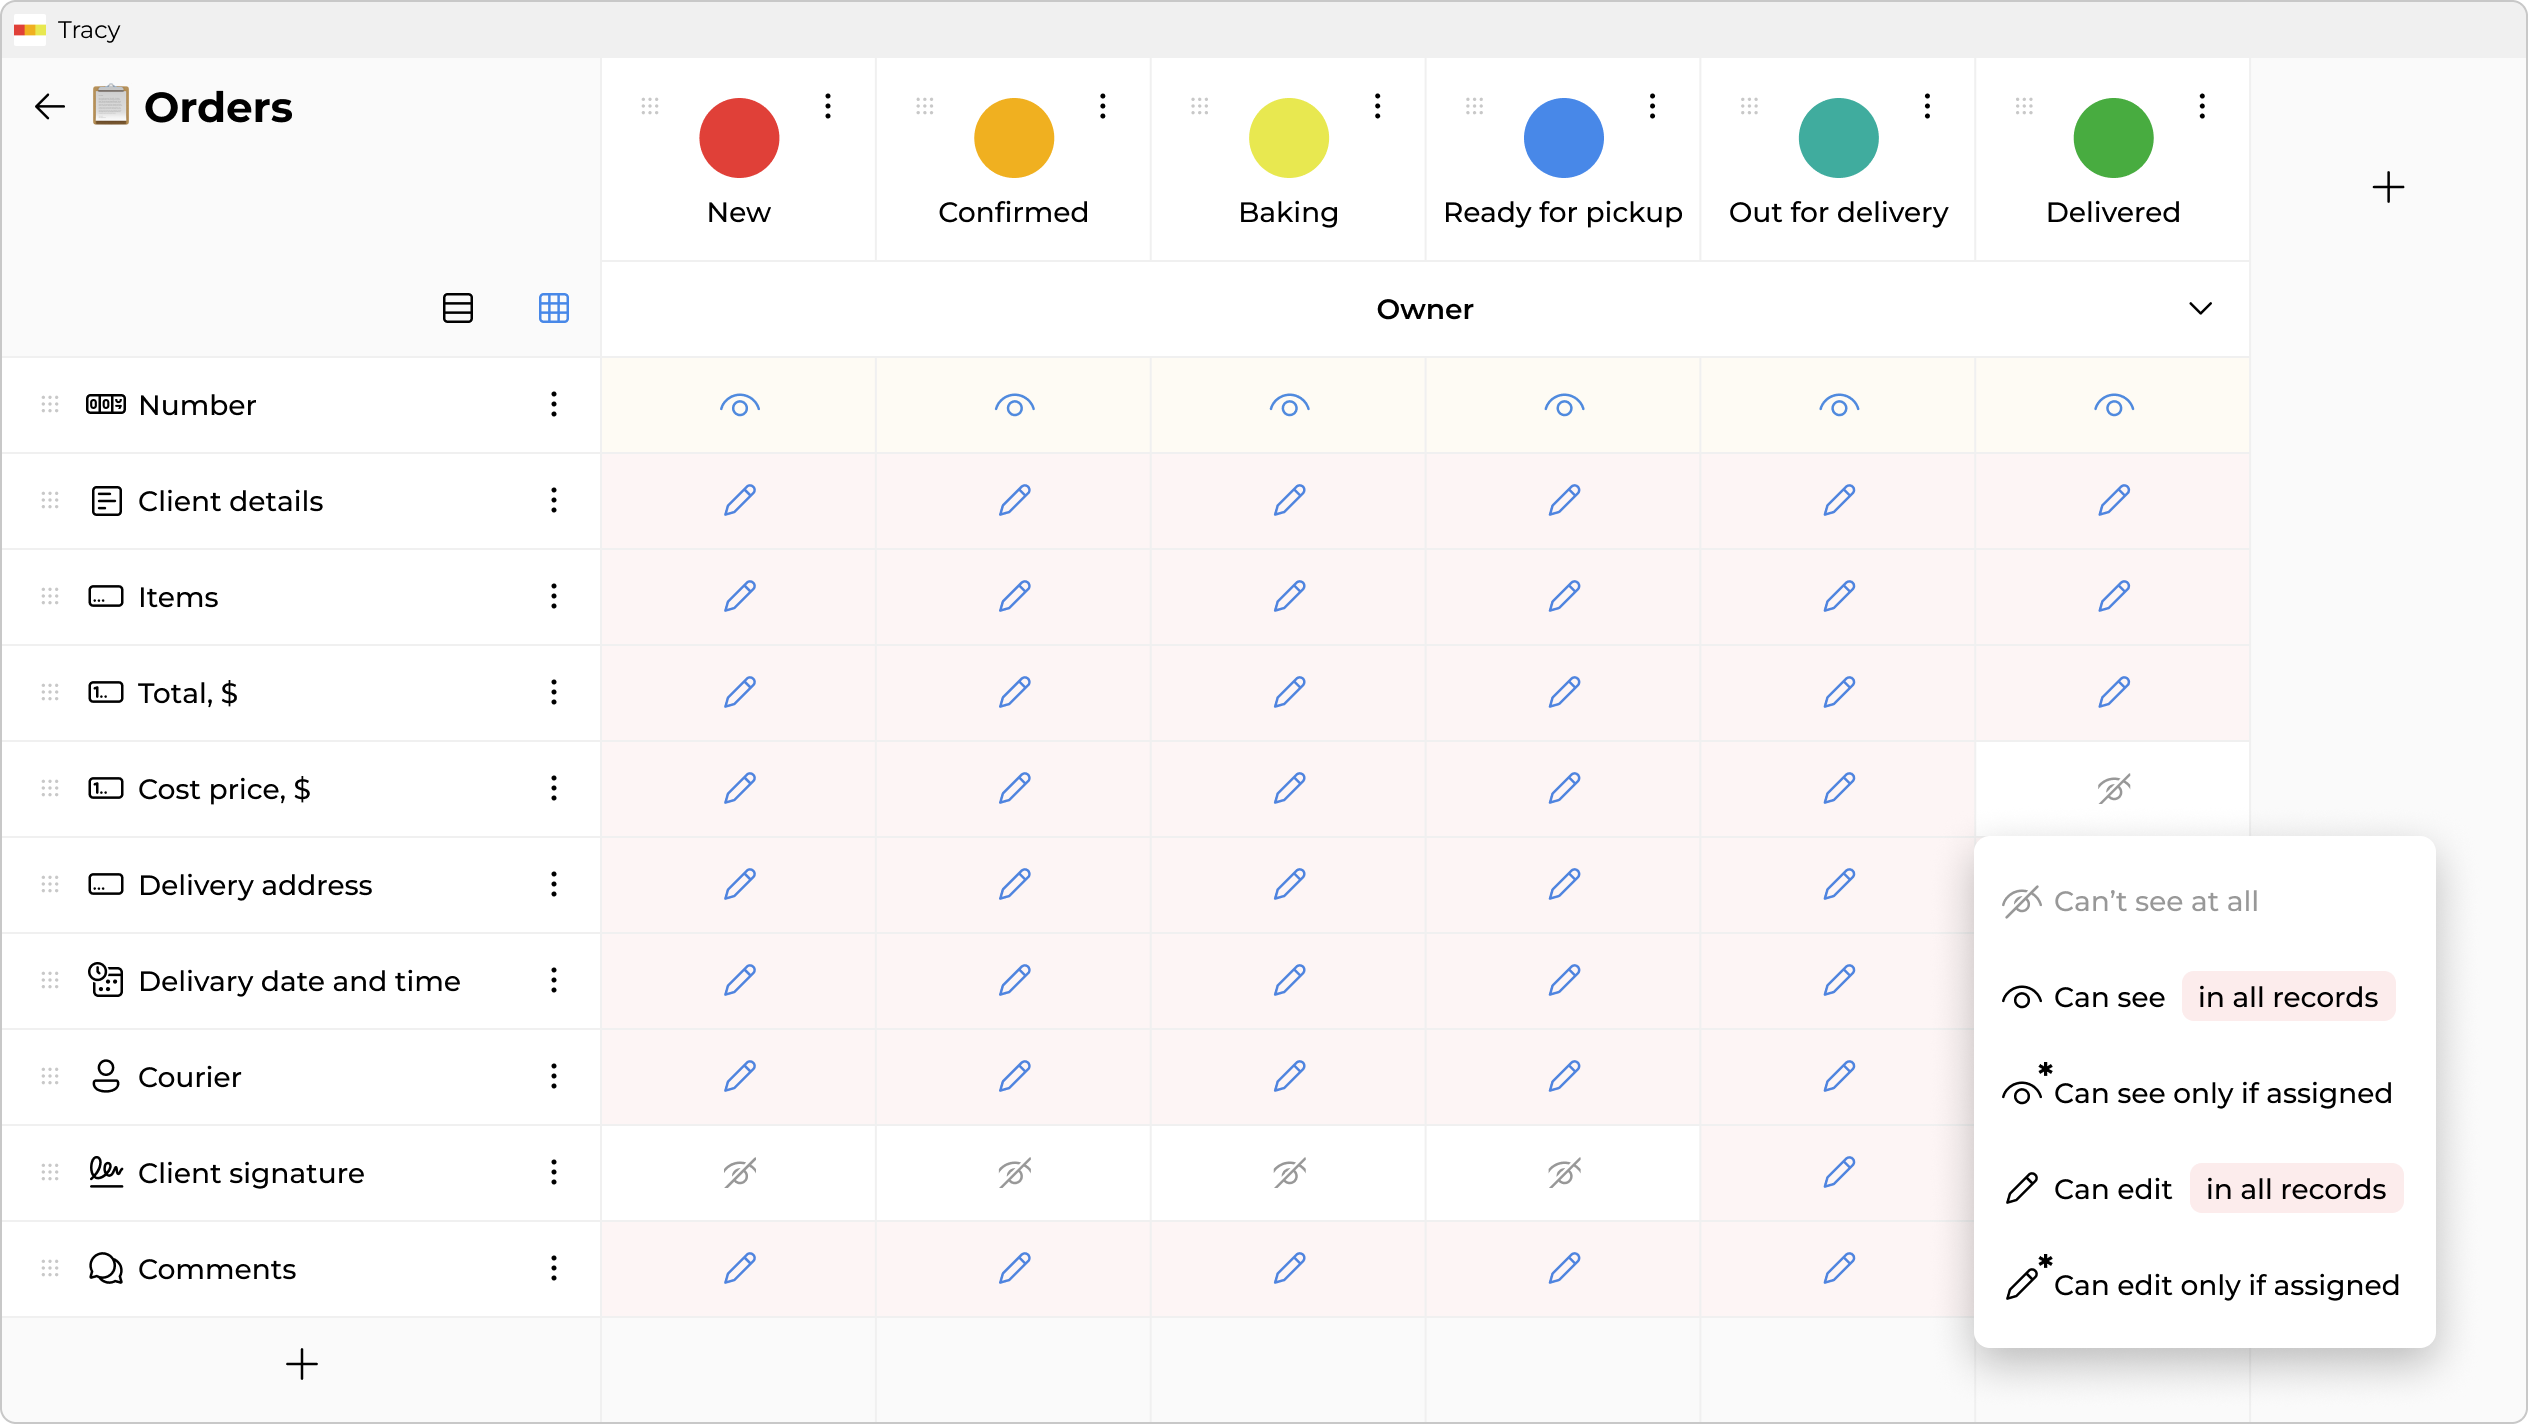
Permissions and Access
Tracy’s permission settings aren’t just about security—they define your workflow logic. They determine not only who can see or edit specific data and when, but also when it is necessary to do so.
There are two types of permissions: those that relate to records as a whole (creation, state change, archiving, deletion) and those that relate to individual property data (viewing and editing). Access is configured according to user roles, record states, and whether the user is assigned to a particular record (i.e., connected to it in any way—as the author, responsible person, supervisor, etc.). Separately for each dataset.
Example #1. In a delivery service, managers can be given editing access to all properties across all order states—or restricted to view-only once an order is completed. Couriers only need a portion of the information (customer name, phone number, address, order contents, and delivery date and time)—view-only, and only when assigned to the order. Since couriers are only responsible for the delivery, they don’t need to see orders in other states.
Example #2. Managers working with clients can be given access only to the clients they added themselves or were assigned to by their supervisor. Or certain data from other managers’ clients can be hidden from them.
Example #3. For an assembler packaging products in a manufacturing facility, the required actions can be displayed one by one as a checklist, using states as process steps—optionally with photo confirmation at key stages.
Example #4. Since a user cannot move a record to the next state without filling in required properties, it’s possible to prevent, for example, a technician installing an air conditioner from closing a request without photos of the completed work and the client’s signature.
To manage access, activate configuration mode using the toggle at the bottom of the sidebar and select “Configure” from the context menu of the desired dataset in the catalog or next to its title.
Configuring Record Action Permissions and Property Access
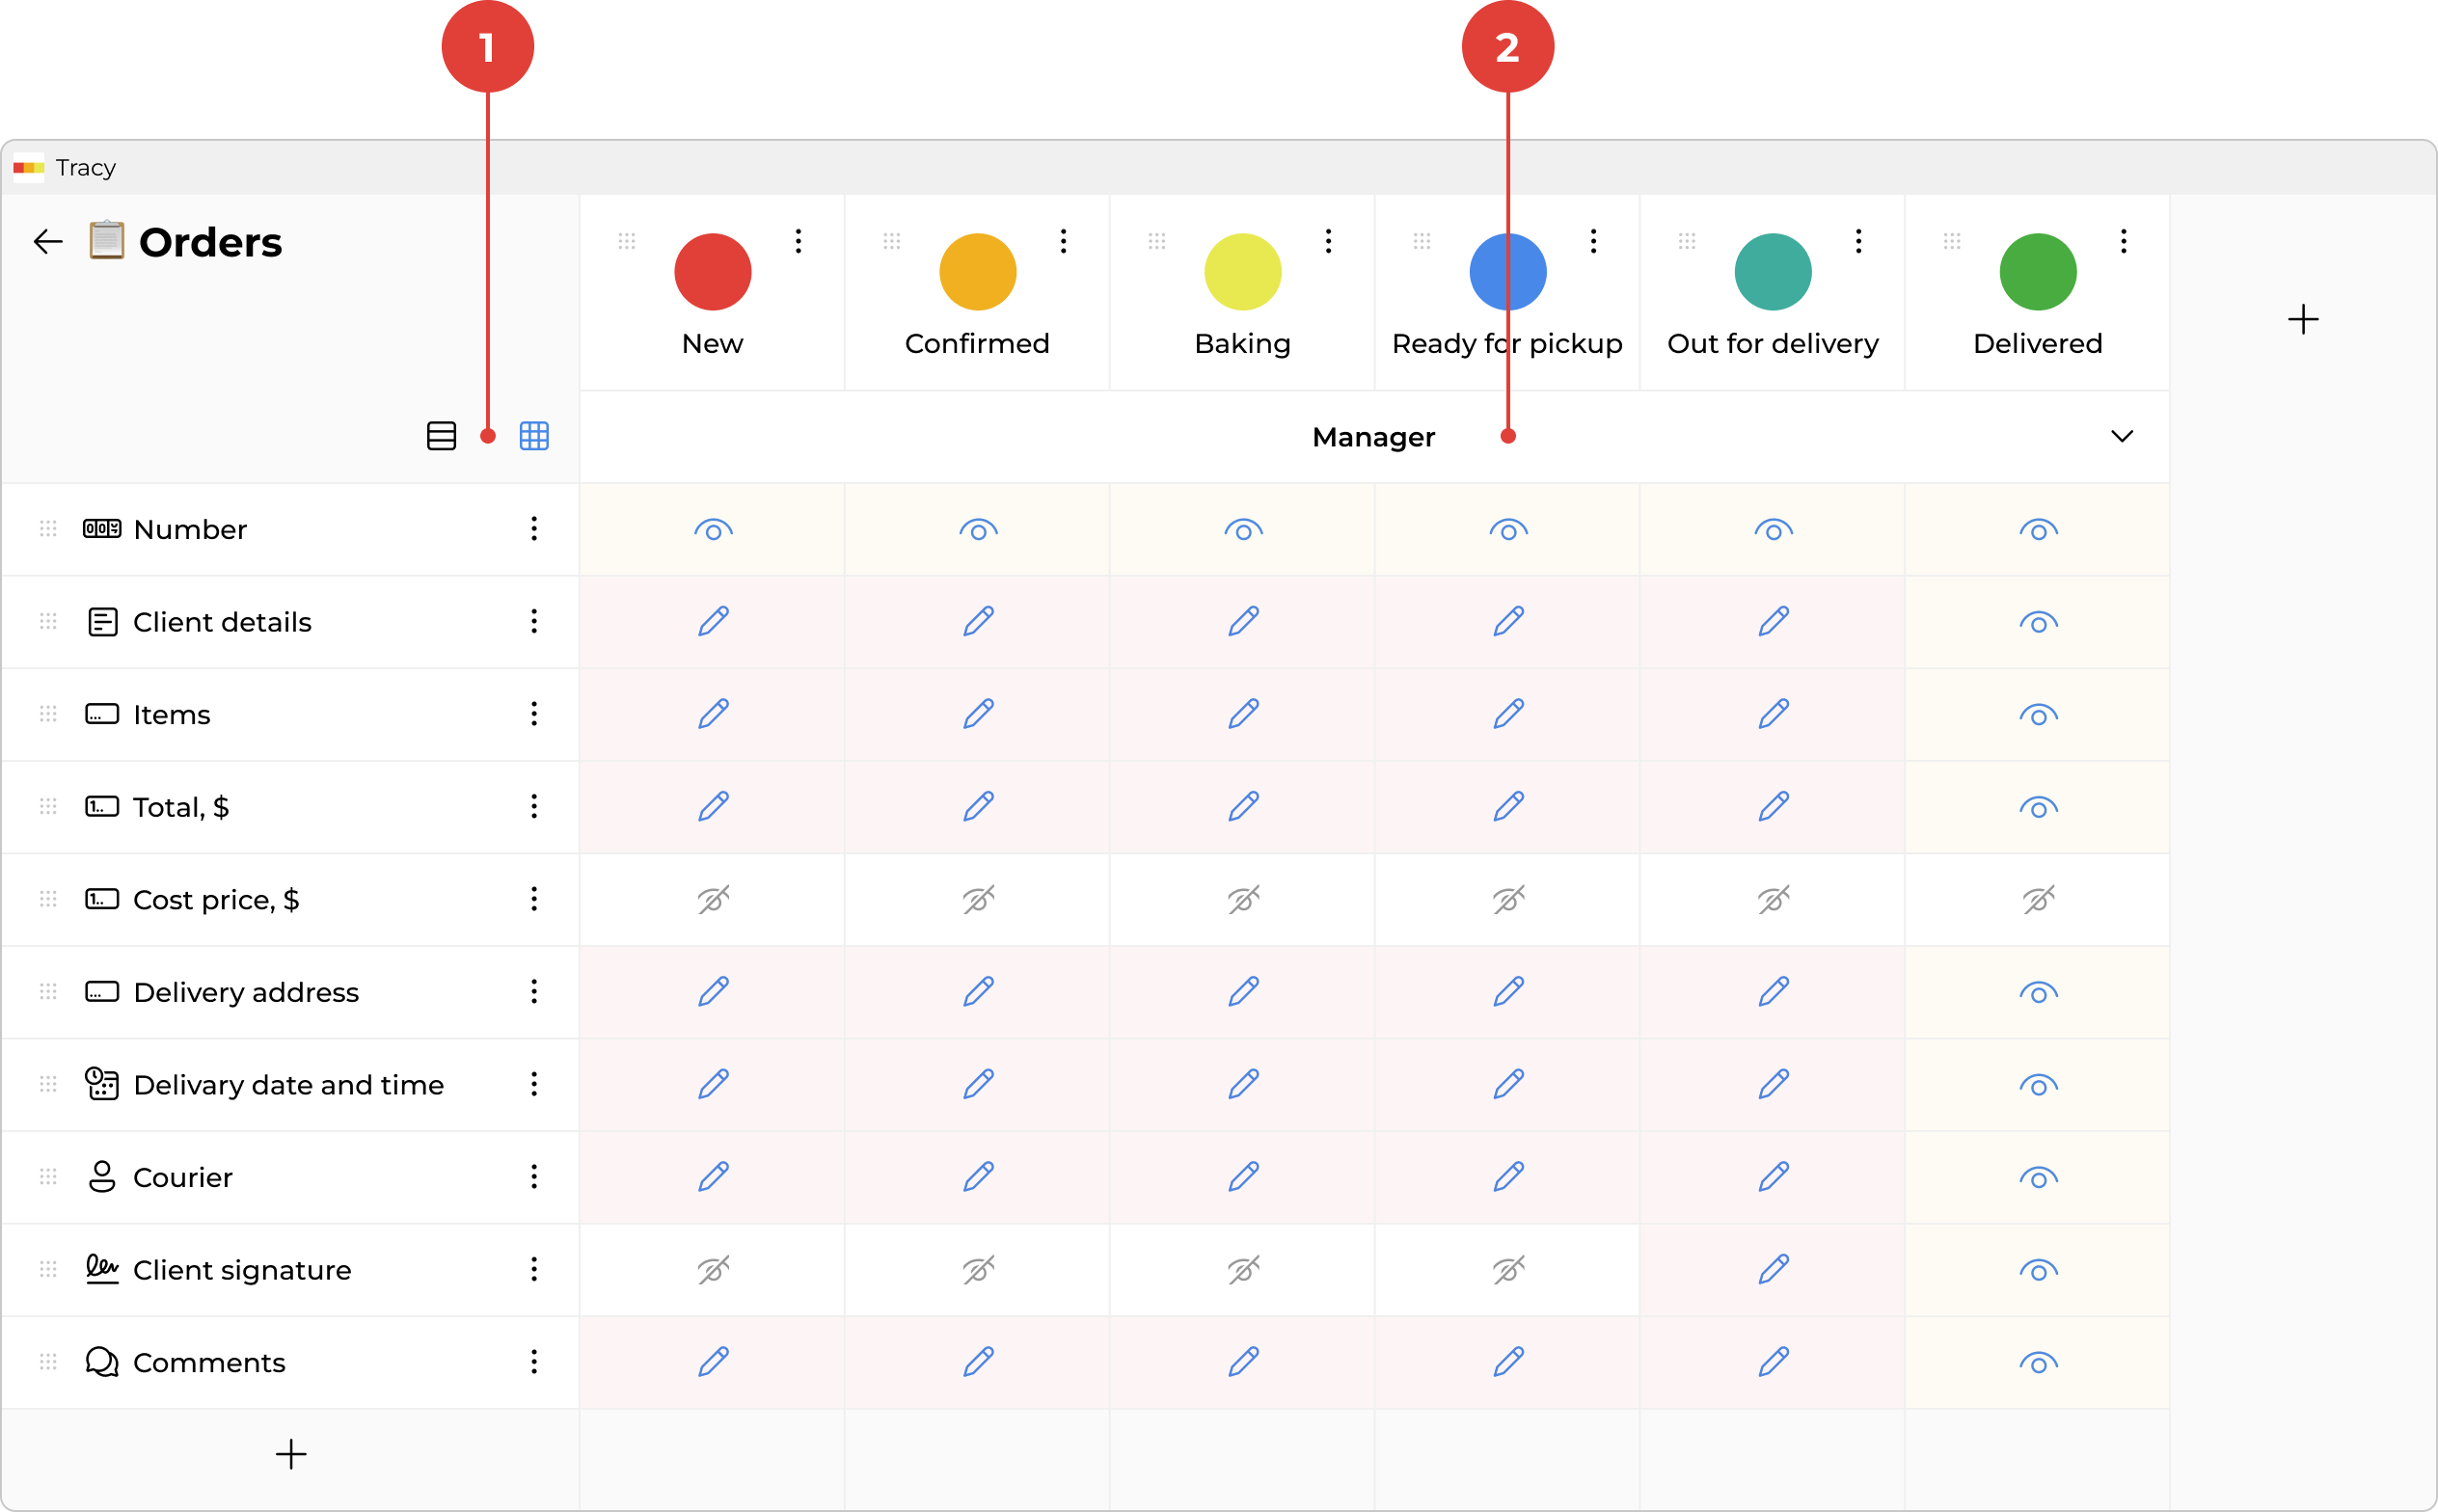
On the left top side of the screen, you can switch between two configuration modes ①: simplified and detailed. In simplified mode, permissions for each action or property are set across all states at once—convenient for initial setup. In detailed mode, you can fine-tune permissions for individual states where needed.
To configure permissions, select the desired role using the selector ② at the top of the screen, then set the permissions for each record action and each property in the corresponding columns.