How to Quickly and Easily Set Up an Online Workspace for Project Management
Scattered tasks, endless chats, lost files—sound familiar? Without a clear project management system, workdays become chaotic. In contrast, a virtual workspace saves time, eliminates confusion, and streamlines workflows.
However, another challenge arises—though not as critical: the overwhelming number of options, making it easy to get lost. Which one should you choose? What should you focus on? How do you set it up without creating even more chaos? And how do you avoid spending more time organizing tasks than actually completing them?
In this article, we will explore different platform options and help you quickly set up your virtual workspace for seamless team collaboration.

Why Is an Online Workspace for Project Management Important?
We often hear about how a well-organized workspace boosts productivity—a spacious desk, a comfortable chair, no unnecessary distractions (or perhaps a few inspiring details to add motivation and aesthetics to the workday)...
However, a workspace is no longer just about a physical place. Or rather, first and foremost, it is not about desks and chairs. In project management, a workspace is essential for making all tools, tasks, and information easily accessible to the team.
That’s why nearly every company relies on a virtual workspace for remote (and in-office) collaboration—platforms like Trello, Asana, or Notion that bring planning, communication, and progress tracking into one place. These online spaces help eliminate traditional workflow barriers:
- No need for extra requests or clarifications, as detailed task information is readily available.
- This information is always accessible from anywhere, on any device.
- Updates happen in real time, ensuring that data is always up to date.
- Processes become more transparent, as all participants receive notifications on changes, statuses, and history logs.
- Teams save significant time thanks to better organization and accessibility.
An online workspace reduces the risk of misunderstandings and missed details—not through excessive control or added bureaucracy but through the smart use of technology and time.

Choosing the Right Tools for Your Workspace
If you haven’t used a virtual workspace before, it is easy to get lost among the many available platforms. We have gathered a few popular options that might be a good fit for your team.
Trello. An easy-to-use workspace that looks like an online task planning board. It allows you to visualize the workflow step by step. Create boards with statuses, add task cards, and move them as they progress—for example, from the “To-Do List” column to “In Progress” and beyond. Each task can include files, checklists, assignees, and more.
Key features:
- Kanban boards with cards and lists.
- Color-coded tags for task labeling.
- Calendar with deadlines and reminders.
- Integrations with other tools (Slack, Google Drive, etc.).
- Task automation.
One drawback of Trello is that it is not suitable for complex projects. As the number of tasks grows rapidly, boards can become cluttered. Access management is also quite limited: privacy settings apply to the entire board rather than individual tasks.
Asana. This is a more functional platform with a wider range of tools and more ways to visualize work—lists, boards, timelines, and calendars. Complex projects can be easily broken down into smaller tasks without disrupting their connections or overall logic.
Key features:
- Customizable task fields.
- Team workload overview.
- Goal tracking for each task.
- Task suggestion form.
- Detailed analytics.
Since there are more features, the system is generally more complex. It will take more time to set everything up, but the interface remains simple and intuitive.
Notion. At first glance, the online workspace seems very simple. However, in reality, it functions as a multitool with an “all-in-one” feature set. Here, you can take personal notes, create documents and a project knowledge base, visualize step-by-step workflows, track task progress, and much more.
Key features:
- Flexible structure with extensive customization and numerous templates.
- Configurable pages, tables, and lists.
- Text editing and formatting tools.
- Templates for quick workspace setup.
- Real-time collaborative editing and comments.
However, it is important to note that Notion is more of an online notebook or knowledge base. It lacks standard project management tools like reporting or complex dependencies. Additionally, with a large amount of data, the workspace may slow down.
Jira. The platform was specifically created for software development teams working with the Agile methodology. In other words, tracking and managing step-by-step repetitive processes is Jira’s main function. It offers tools for sprint planning, defect descriptions, release management, detailed reports, and more.
Key features:
- Advanced settings for complex processes.
- Task, defect, and sprint tracking.
- Time tracking and task estimation tools.
- Templates for strategic planning.
- Advanced reporting and analytics capabilities.
Still, Jira remains quite a niche tool. The platform is very flexible, but it is the most complex to set up among all the mentioned options. It requires time for learning and configuration. Compared to other workspaces, the interface seems outdated.
Monday.com. Here, we can talk about the complete opposite of Jira—colorful and clear interfaces, intuitiveness, and ease of use. At the same time, the platform doesn’t fall short in terms of functionality. It also offers flexible settings, the ability to represent any process, and automation of repetitive tasks.
Key features:
- Blocks that are easy to configure for flexible workflows.
- Different view options (Kanban, calendar, timeline, etc.).
- Color indicators for statuses.
- Formula columns for calculation fields.
- Tools for workload and resource planning.
- A wide range of integrations.
A large number of settings can be both an advantage and a drawback. For example, they can easily overload the planning system, especially for simple tasks. Another downside is the pricing plans, which are tied to the number of users and features. There is a risk that the cost of using the platform will grow just as quickly as your team.
Tracy. The platform was designed as a universal tool for a wide range of projects—from sales teams to charitable organizations and field services. It offers ready-to-use templates that can be easily adapted to your needs, as well as the flexibility to set up any process from scratch.
Key features:
- Available are various data sets (we will discuss them in more detail later).
- Detailed cards with flexible fields (text, photos, location, lists, etc.).
- Multiple visualization options—Kanban, charts, calendar, and more.
- Workload and efficiency tracking.
- Customizable role-based access settings.
- Integration with messengers, calendars, and other applications.
At first glance, Tracy follows a similar logic to Trello. However, while Trello wins in ease of setup, it significantly lags behind in flexibility. Tracy offers advantages in access management: confidentiality can be customized not just for individual tasks but also for the information within them. The key is to get familiar with the data set structure from the start.
What to Consider When Choosing a Workspace
As mentioned earlier, Jira was designed as a tool for technical teams. So, it is no surprise that the platform isn’t suitable for everyone—both in terms of complexity and logic. The same applies to simpler options, where the lack of settings might not be enough for managing a complex project.
So how do you determine which workspace is right for you? Here’s a list of criteria that will help you evaluate the available options.
- Functionality. What tasks and problems does the workspace need to solve for your team? Are the available features and settings sufficient for your needs?
- Simplicity. How easy is it to set up the workspace? How intuitive are the interface, features, and instructions? Do you need external help, additional explanations, or training?
- Flexibility. Can you customize processes and templates individually? Are there limitations regarding the number of users, processes, etc.? What types of information, attachments, fields, etc., are supported?
- Access control. Can you create user profiles with different access levels? Can you make certain processes and individual tasks confidential?
- Cross-platform support. On which devices is the workspace accessible? Can you install the app, or is it only available in the web version (via a browser)? Is it easy to use on a smartphone?
- Integrations. Can you connect additional apps, such as a messenger, calendar, and other tools your team uses? Does this require additional development?
- Pricing. Are there multiple pricing plans available? How clear and logical are they? Does functionality depend on the design, and to what extent? How much will the price increase as the team grows?
The best option is to start by exploring the trial period. Of course, integrating all processes at once would be excessive. However, you can select a few tasks—either illustrative or the most complex—and set them up in detail. Involve several project participants to test the platform in action and gather feedback.
Alternatively, you can approach the selection differently and base it on the specifics of the project. If the direction of work typically doesn’t have a significant impact, then the complexity of processes and team size often play a decisive role in the choice.
- Solo projects: Notion or Trello. Notion offers flexibility and allows you to personalize the workspace down to the smallest details. Trello is well-suited for handling simple processes.
- Team projects: Asana or Monday.com. If you need a platform for 5–20 people, both options will work well. They are most similar to each other in functionality and interface.
- Large-scale projects: Jira (for technical teams) or Monday.com. Both platforms can handle large and complex projects. In fact, they were designed specifically for such tasks.
Tracy is the only workspace among the mentioned ones that, without exaggeration, is suitable for various types of projects. The pricing plans here differ based on resource usage. A team of three people, who need up to 250 records (clients, orders, etc.) and up to 500 MB of storage, can use the free version. At the same time, the functionality will be identical to that of a team with an unlimited number of users.
Step by step: Setting up Tracy workspace
Setting up the workspace doesn’t necessarily have to be a challenge for the entire team. If the platform meets your needs, the process will be quick and intuitive. Let’s take Tracy as an example.
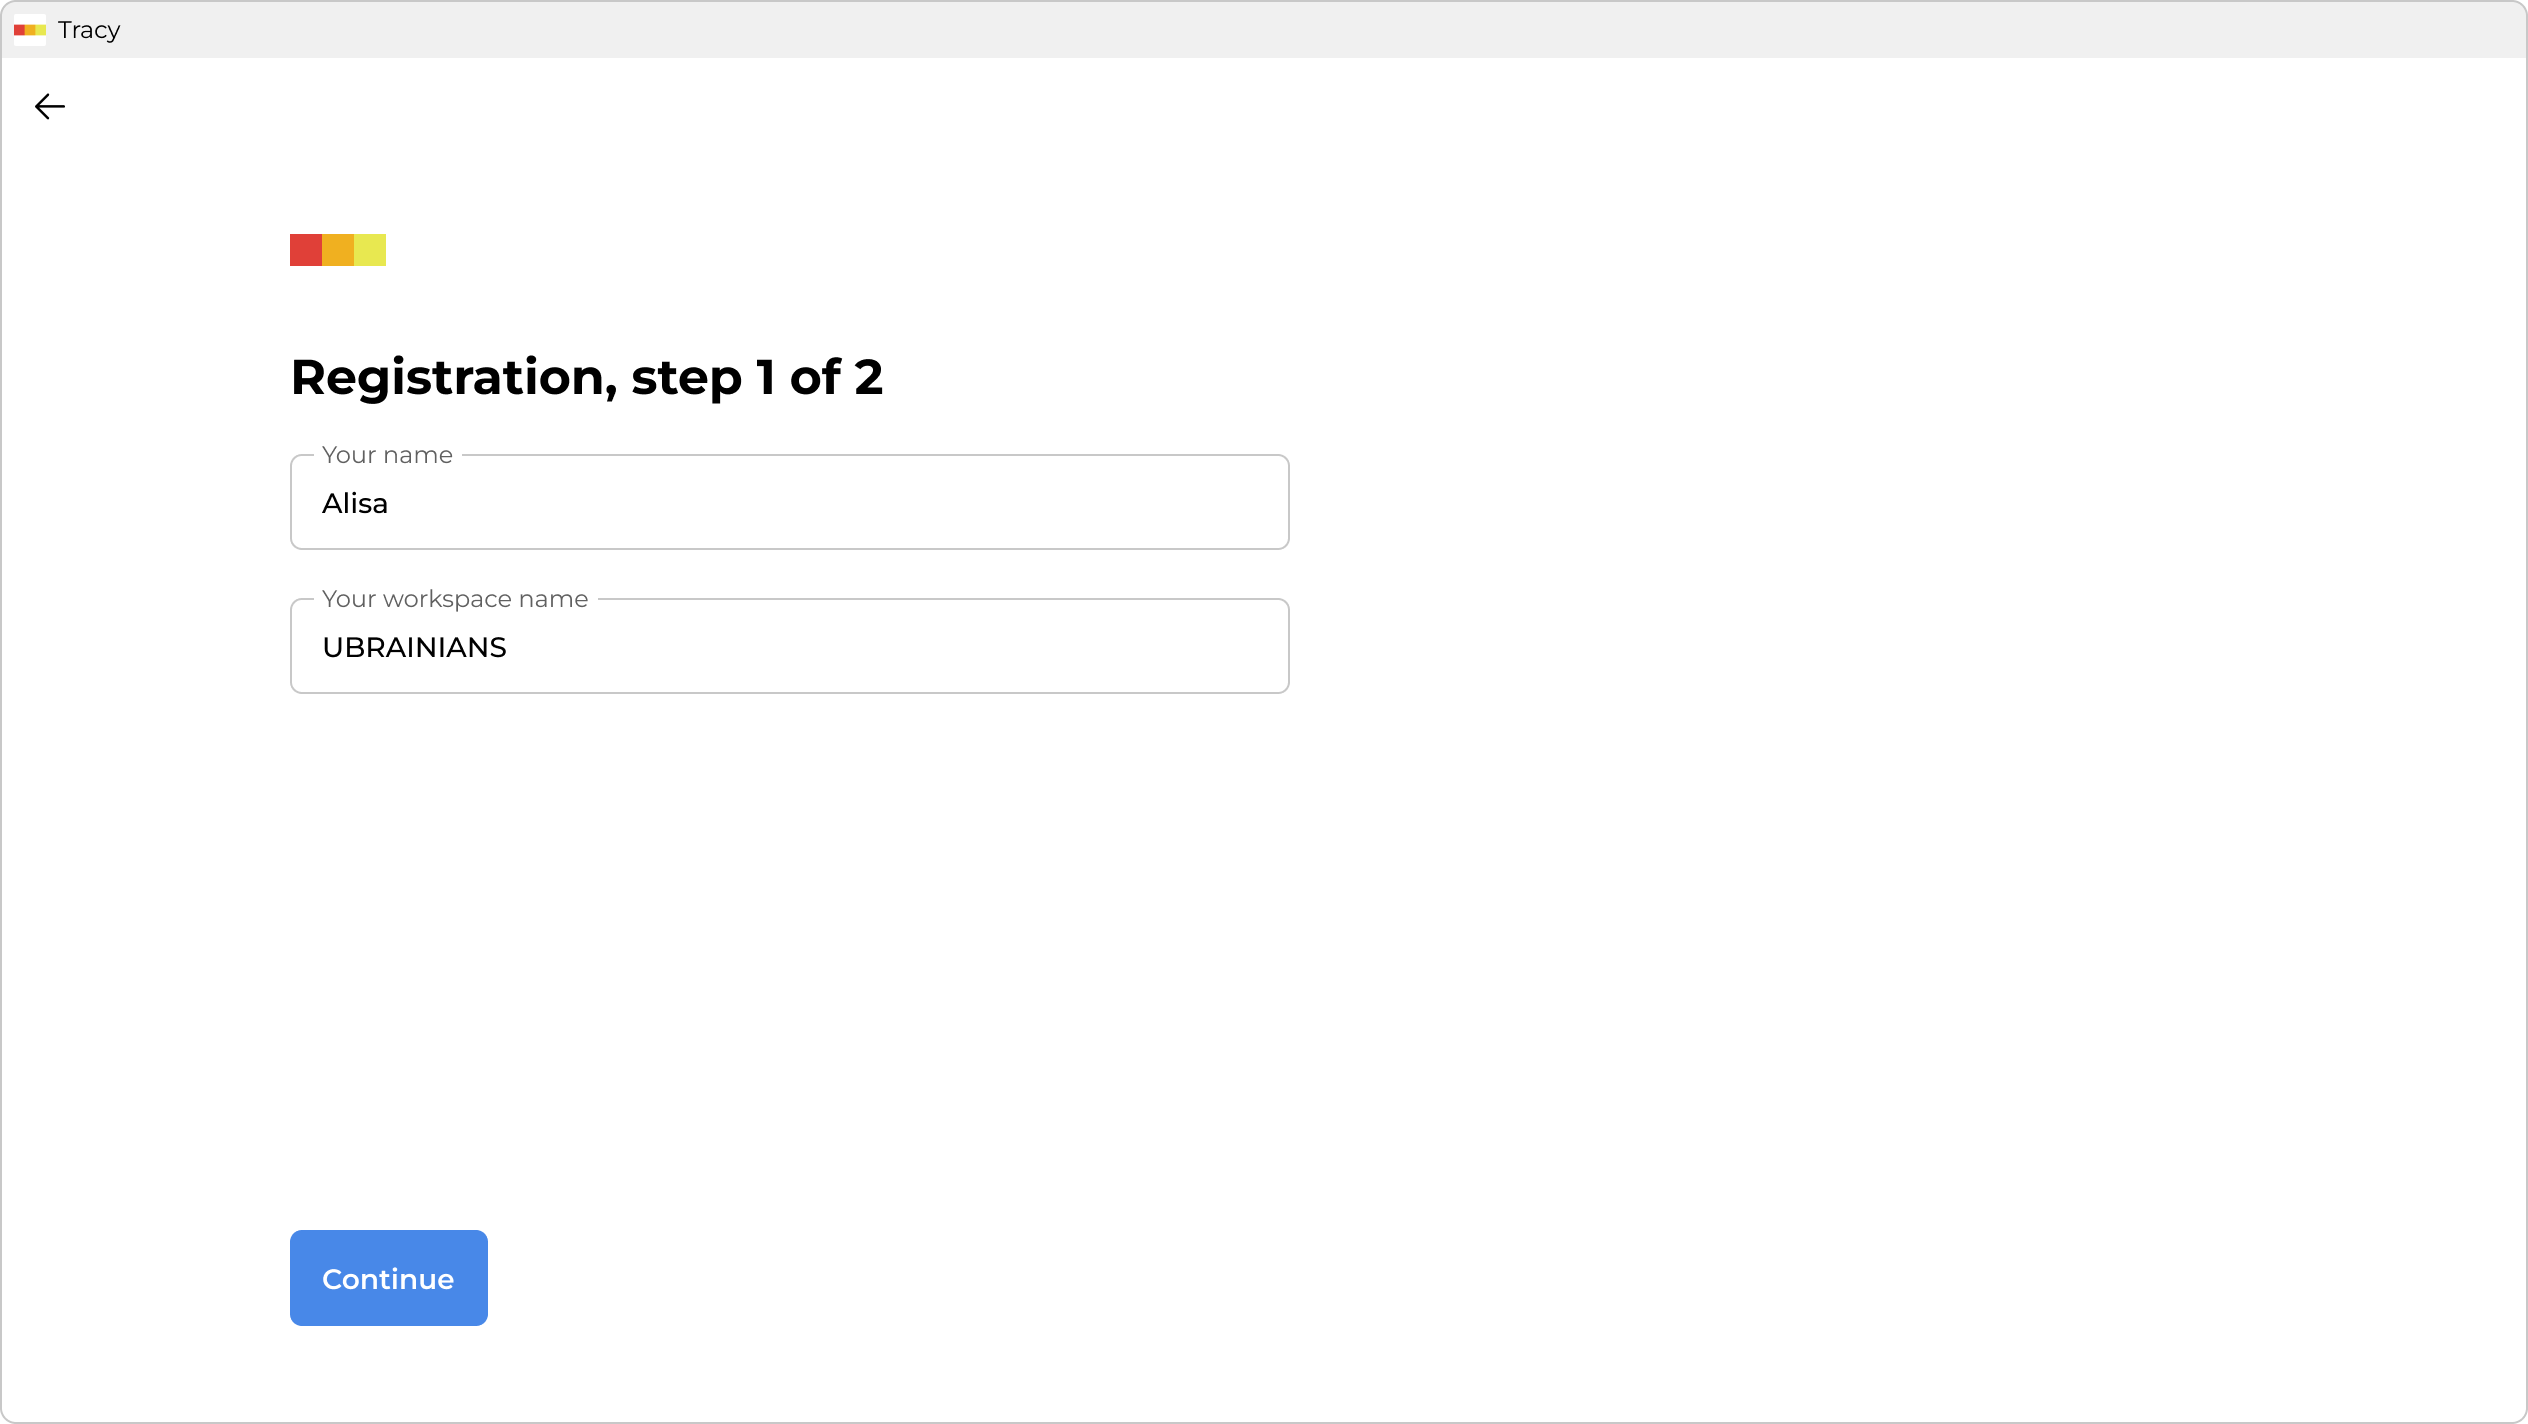
Step 1: Register an Account
Go to the registration page and enter your email address. A confirmation email with a verification code will be sent to the provided email address. Enter this code in the corresponding field on the registration page.
To continue, confirm your agreement with the Terms of Service and Privacy Policy.
Enter your name and the project or team name (company, group, etc.).
Step 2: Choose a Template
The platform will prompt you to choose a template, which you can further customize to suit your needs—adding missing elements and removing unnecessary ones. Available options include:
- Sales and Clients (CRM)
- Project and Task Management
- Human Resources (HR)
- Logistics and Delivery
- On-Site Service
- Field Service
- Custom Manufacturing
- Request Processing
- Other
Choose a template and click the “Create Workspace” button. If—for some reason—the template you chose at the beginning of your work doesn't suit you, you always have the opportunity to change it.

Step 3: Customize the Workspace
First, add users—enter their email addresses, names, and assign roles (for example, “Content Manager”, “Designer”, or “Accountant”), and define their access level to the system settings (“User”—without access to the configuration, “Administrator” or “Owner”). Each new participant will receive an invitation via email. To join, they will need to confirm their registration by clicking on the link. You can add a photo and contact details to each profile, select the time zone, language, and theme.
Next, configure notifications for different conditions and statuses. If it is easier, you can choose which activity alerts to receive—whether as a notification or email, for any action or just for selected ones. For example, you can be notified about all new tasks but receive updates and changes only when you are assigned as the task owner.
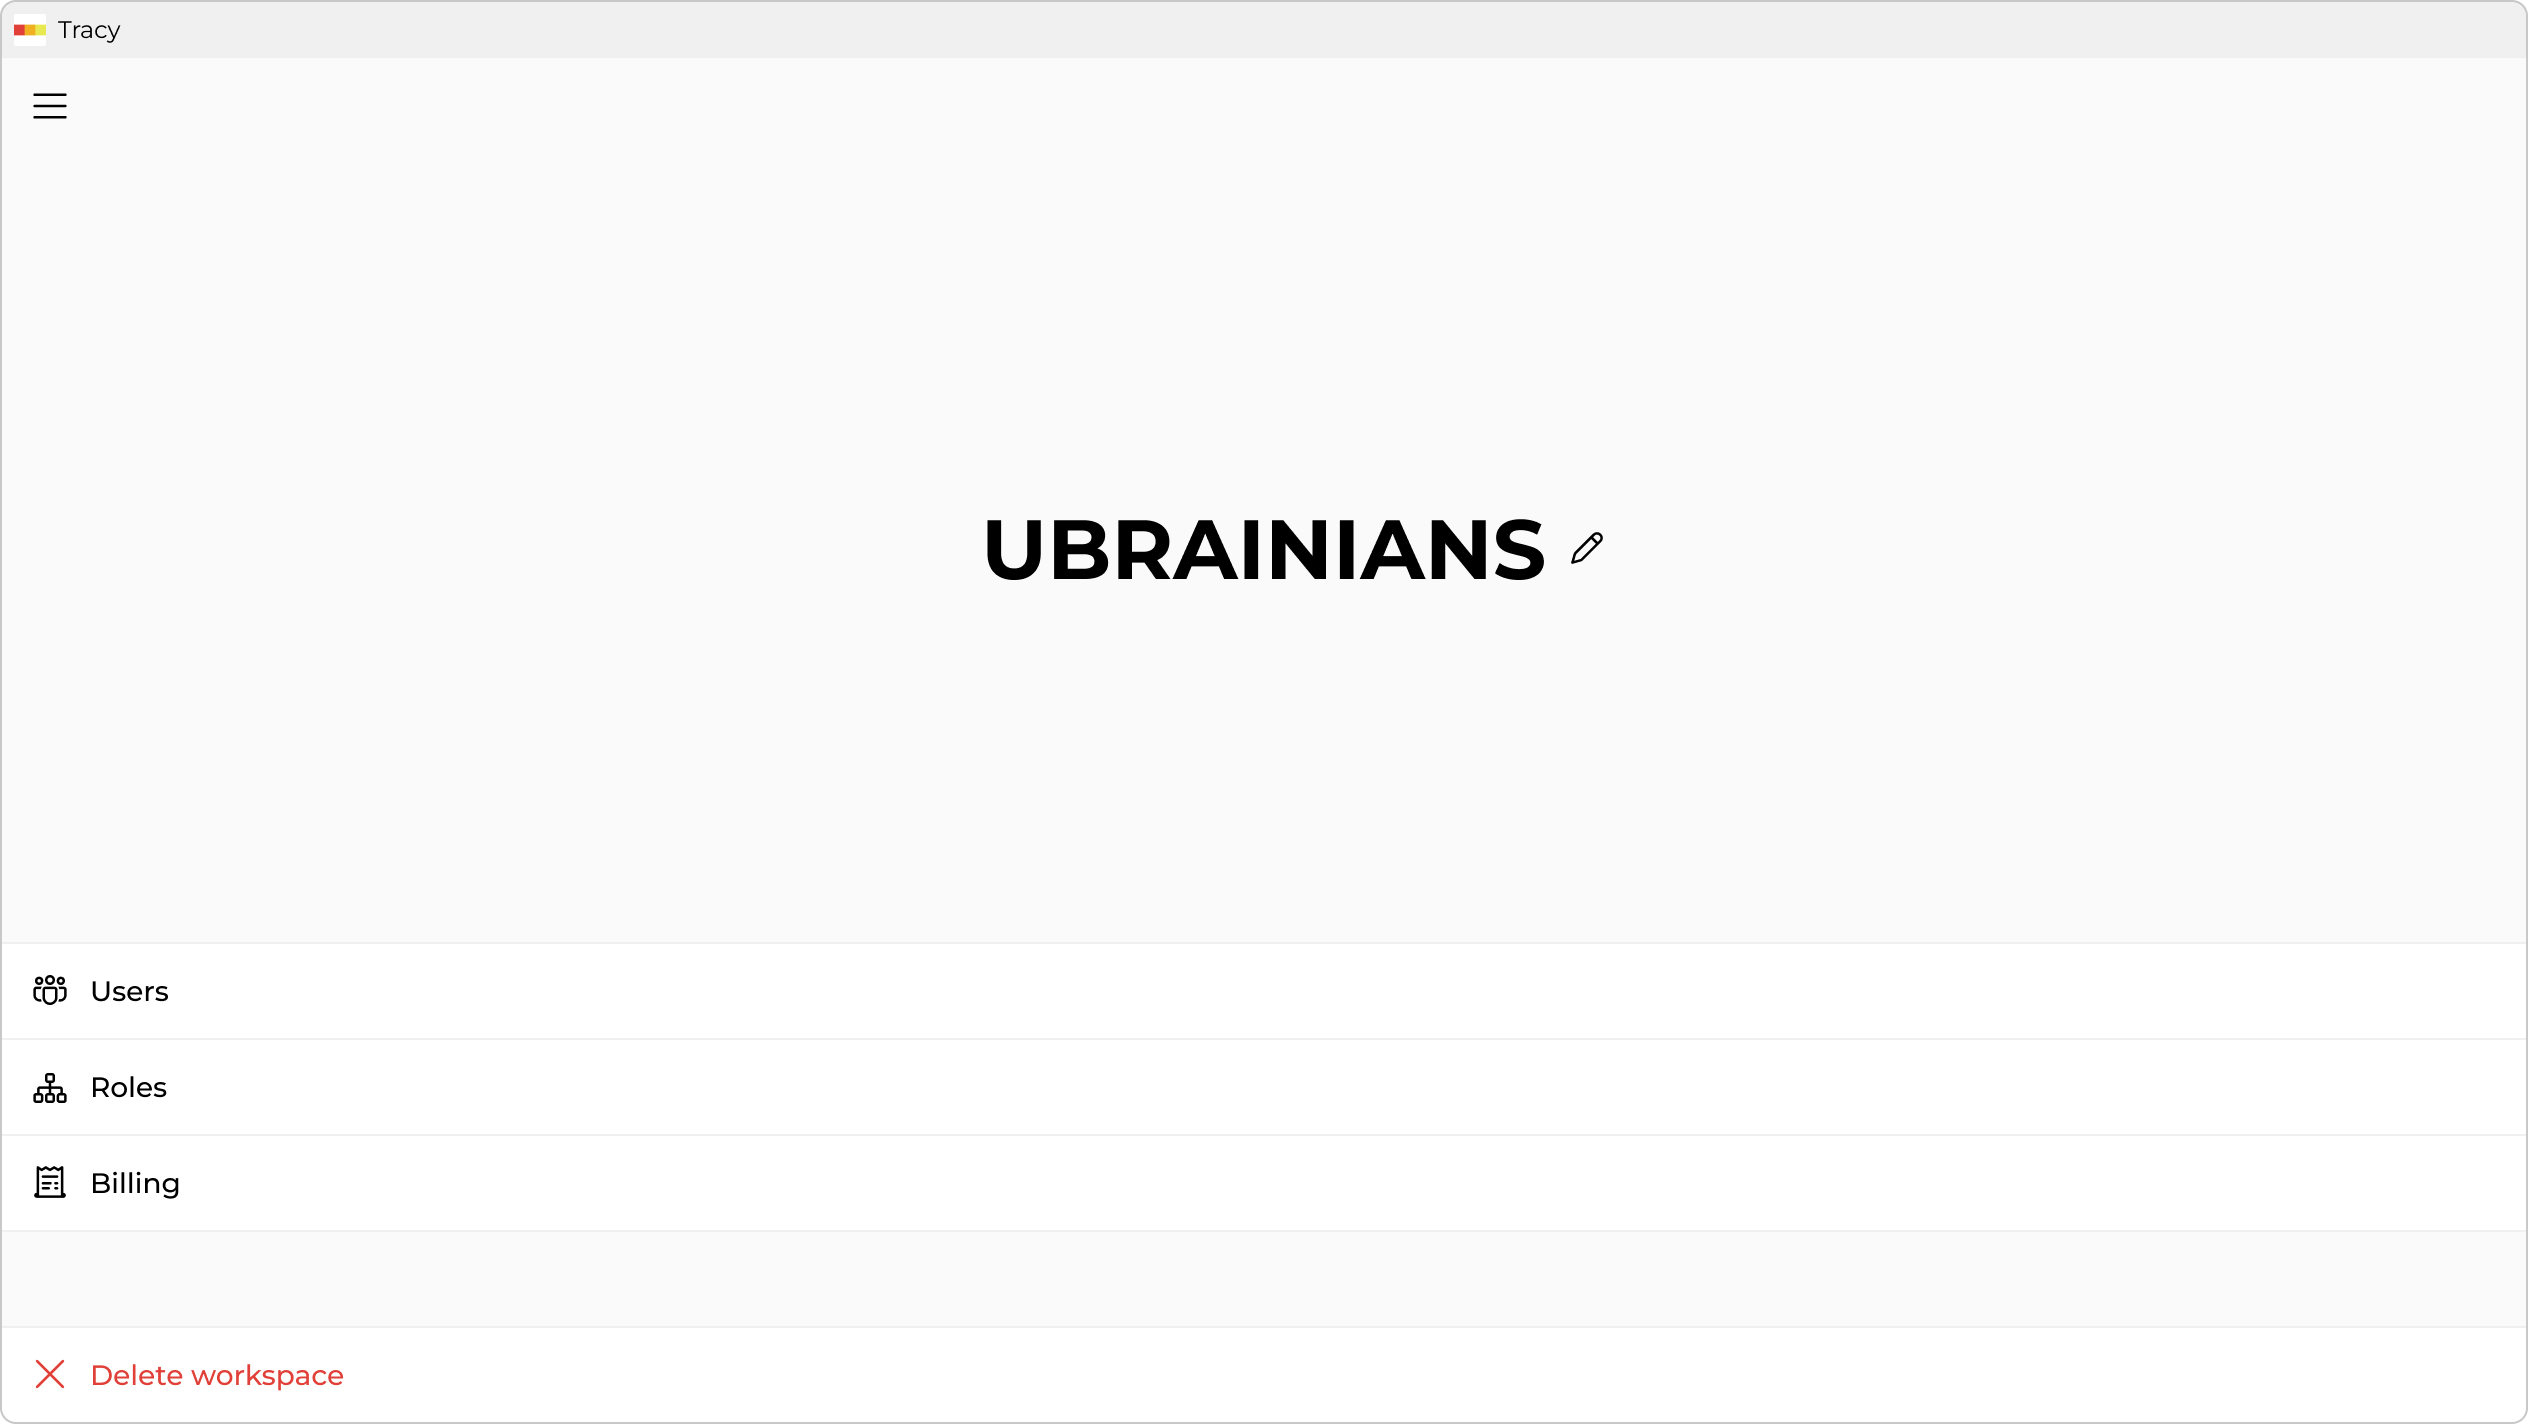
The free plan allows for up to three users. Limits related to the number of records and storage capacity can be monitored in the “Billing” section. Here, you can also change your plan if needed.
Step 4: Create Data Sets
In the bottom left corner, find the “Setup Mode” and activate it. Start customizing the workspace to suit your needs.
Depending on the template you have chosen, you will have several pre-existing data sets. For example, the “Sales and Clients (CRM)” template includes pre-made sets like “Leads” and “Tasks”. If these don’t fit your needs or there aren’t enough, click the “Add Data Set” button on the left panel to create the necessary ones, such as “Client Database”.
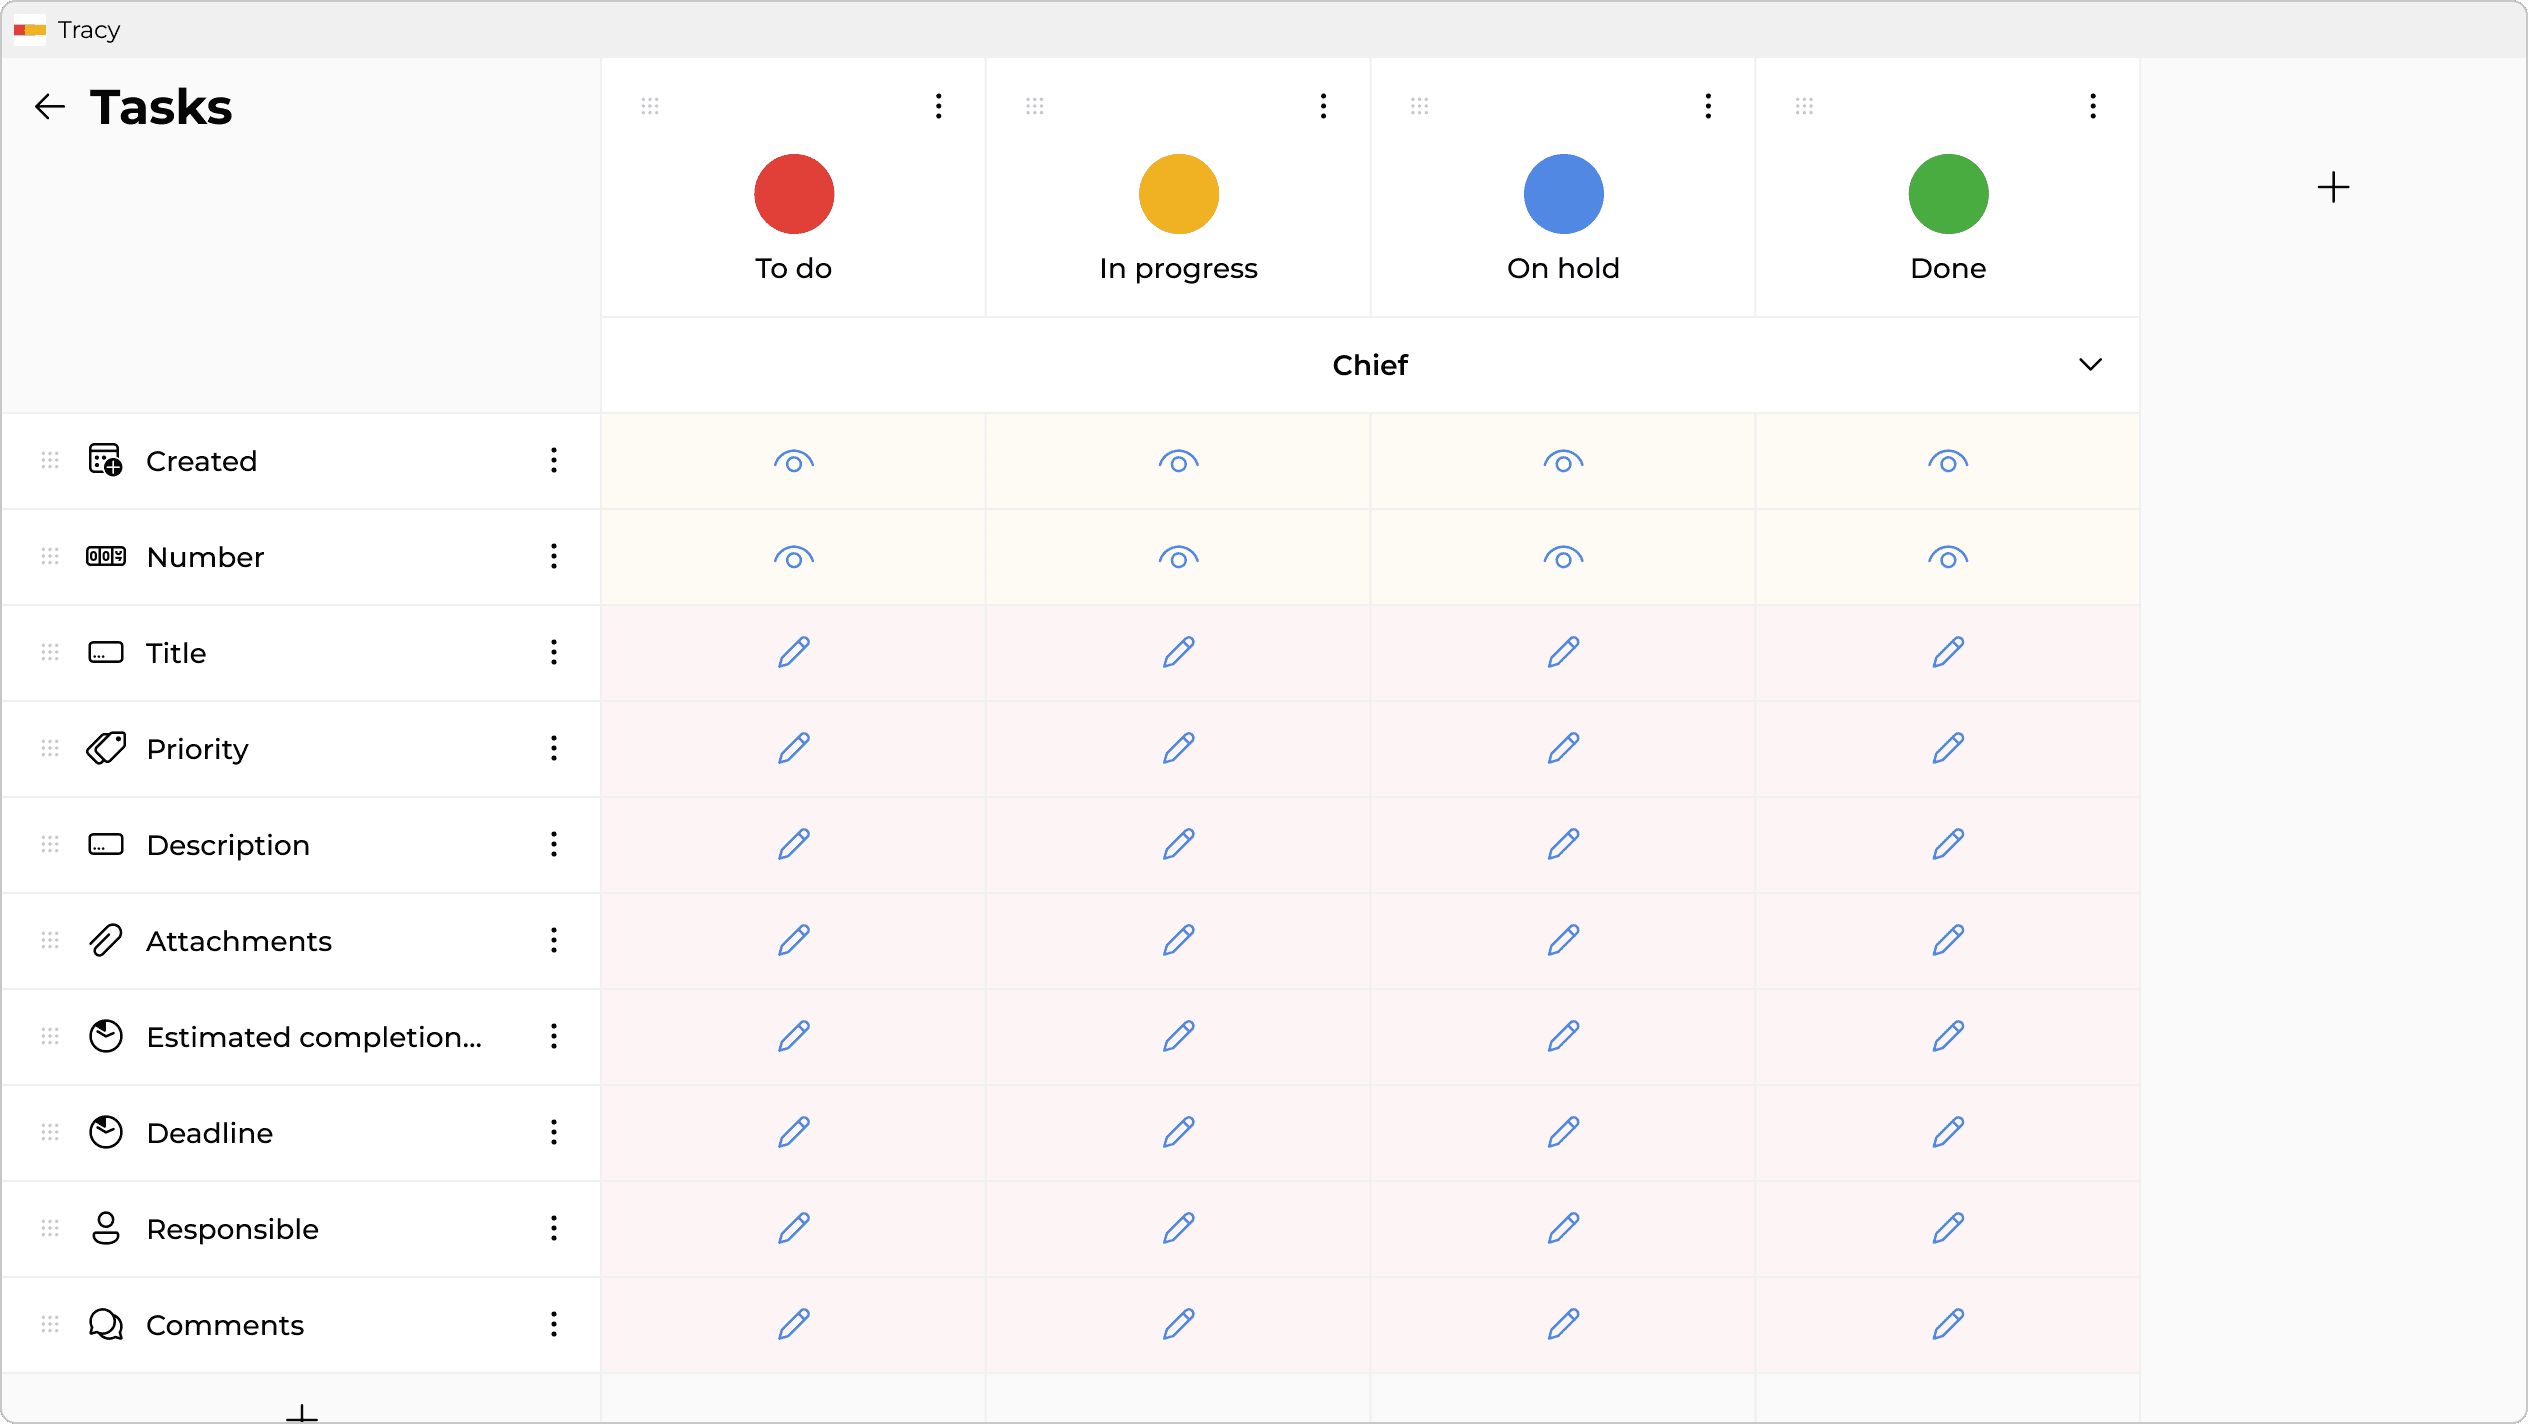
Next, customize the properties. At this stage, you will define the format for the cards—deciding what information each task card will contain. If you are creating a card from scratch, you can choose the fields you need. Available options include date, title and its parameters, phone number and format, email, link, duration, image, location, and more. You can mark each field as required or optional.
In this section, you can also configure the states. For example, when dealing with clients, you can add states like “new”, “potential”, “active”, and “inactive”. For task stages, you can use states like “assigned”, “in progress”, “completed”, etc. Each state can be color-coded for convenience.
Step 5: Create and Customize Representations
By default, cards are displayed as a list. However, you can change this by altering the representation or adding more options. In addition to the list view, information can be displayed in the following formats:
- Kanban board
- Gantt chart
- Calendar
- Funnel
- Time report
- Time tracking table
- Efficiency
- Workload
- Schedule
- Map
- Image gallery
We recommend adding several representations and testing which ones work best for you.
To add a representation, click the “+” at the top of the screen and choose a type, for example, “Kanban board”. Name your representation (e.g., “Board”). Select which properties to display (all or selected). Choose the sorting order for records (chronological or by property). Then, click “Save”. Now you have two representation options that you can toggle between by clicking on them.
To avoid overwhelming your workspace with too much information, you can configure which task properties to display. Select only the most important properties for the preview. Full information can be viewed by clicking on the card.
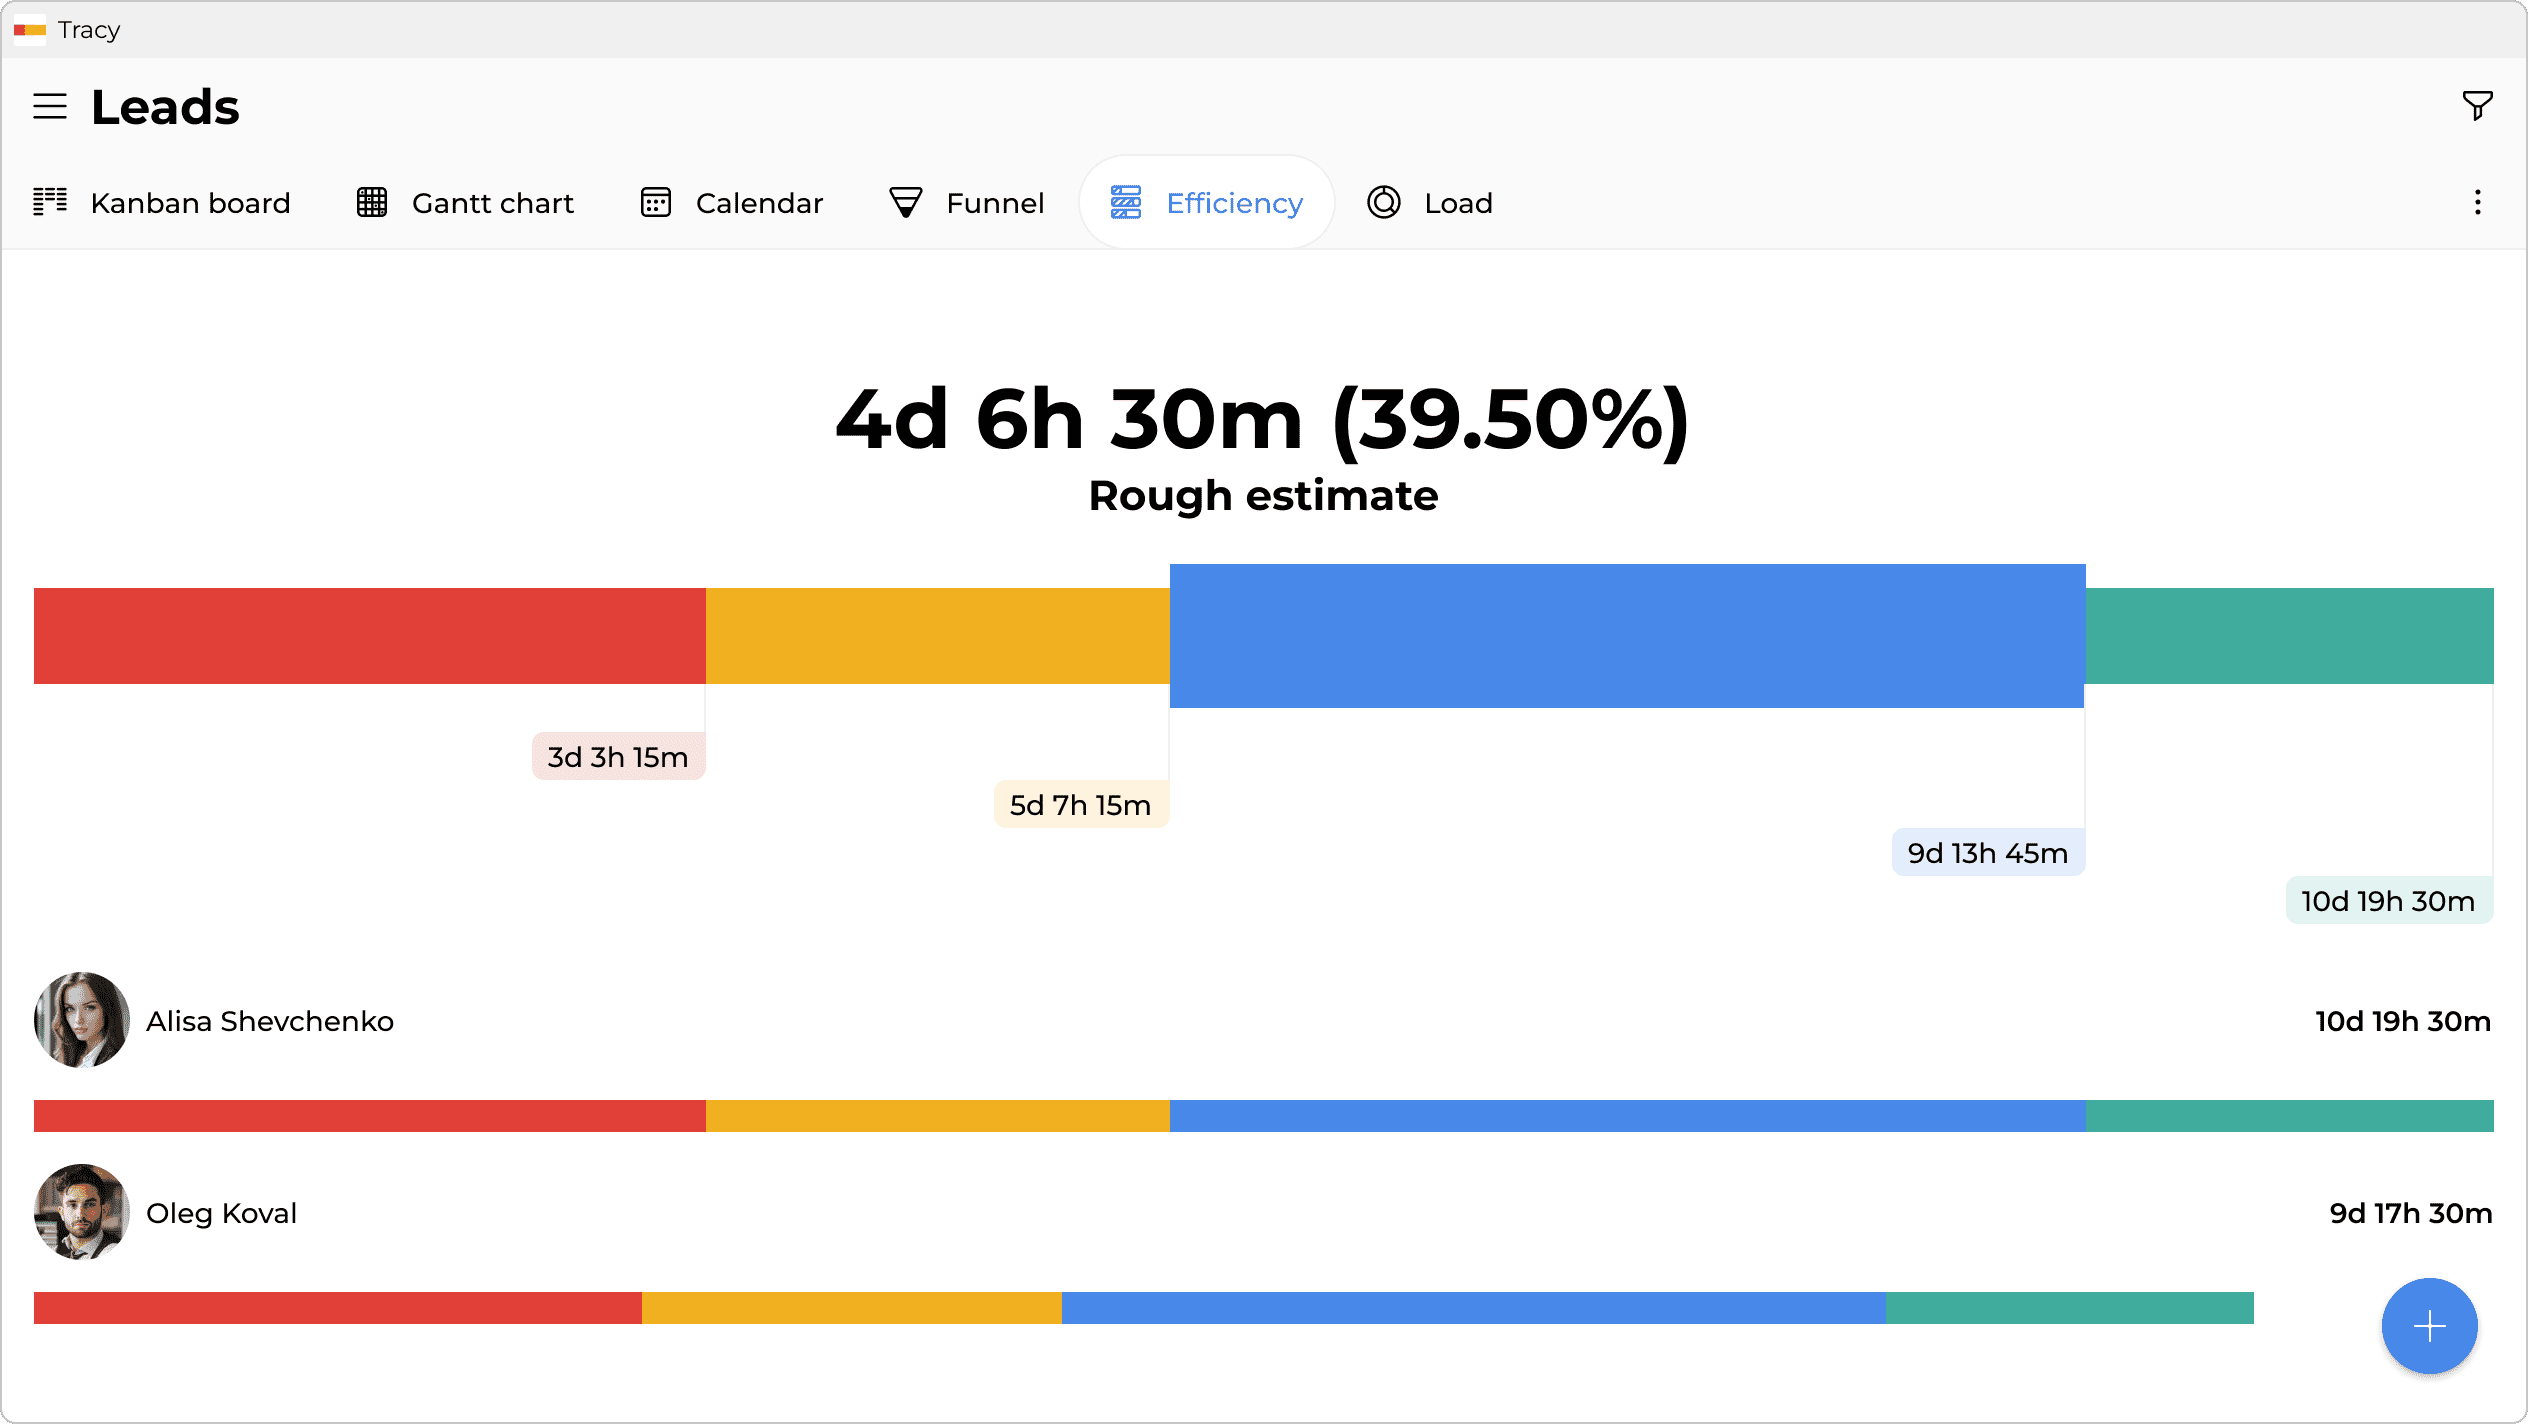
One of the most useful representations is “Efficiency”, which shows how long a task stays in each state (on average and overall). For example, in the “Sales and Clients (CRM)” template, this helps assess how productive and profitable your interactions with clients are.
Step 6: Customize the Workspace View for Each Team Member
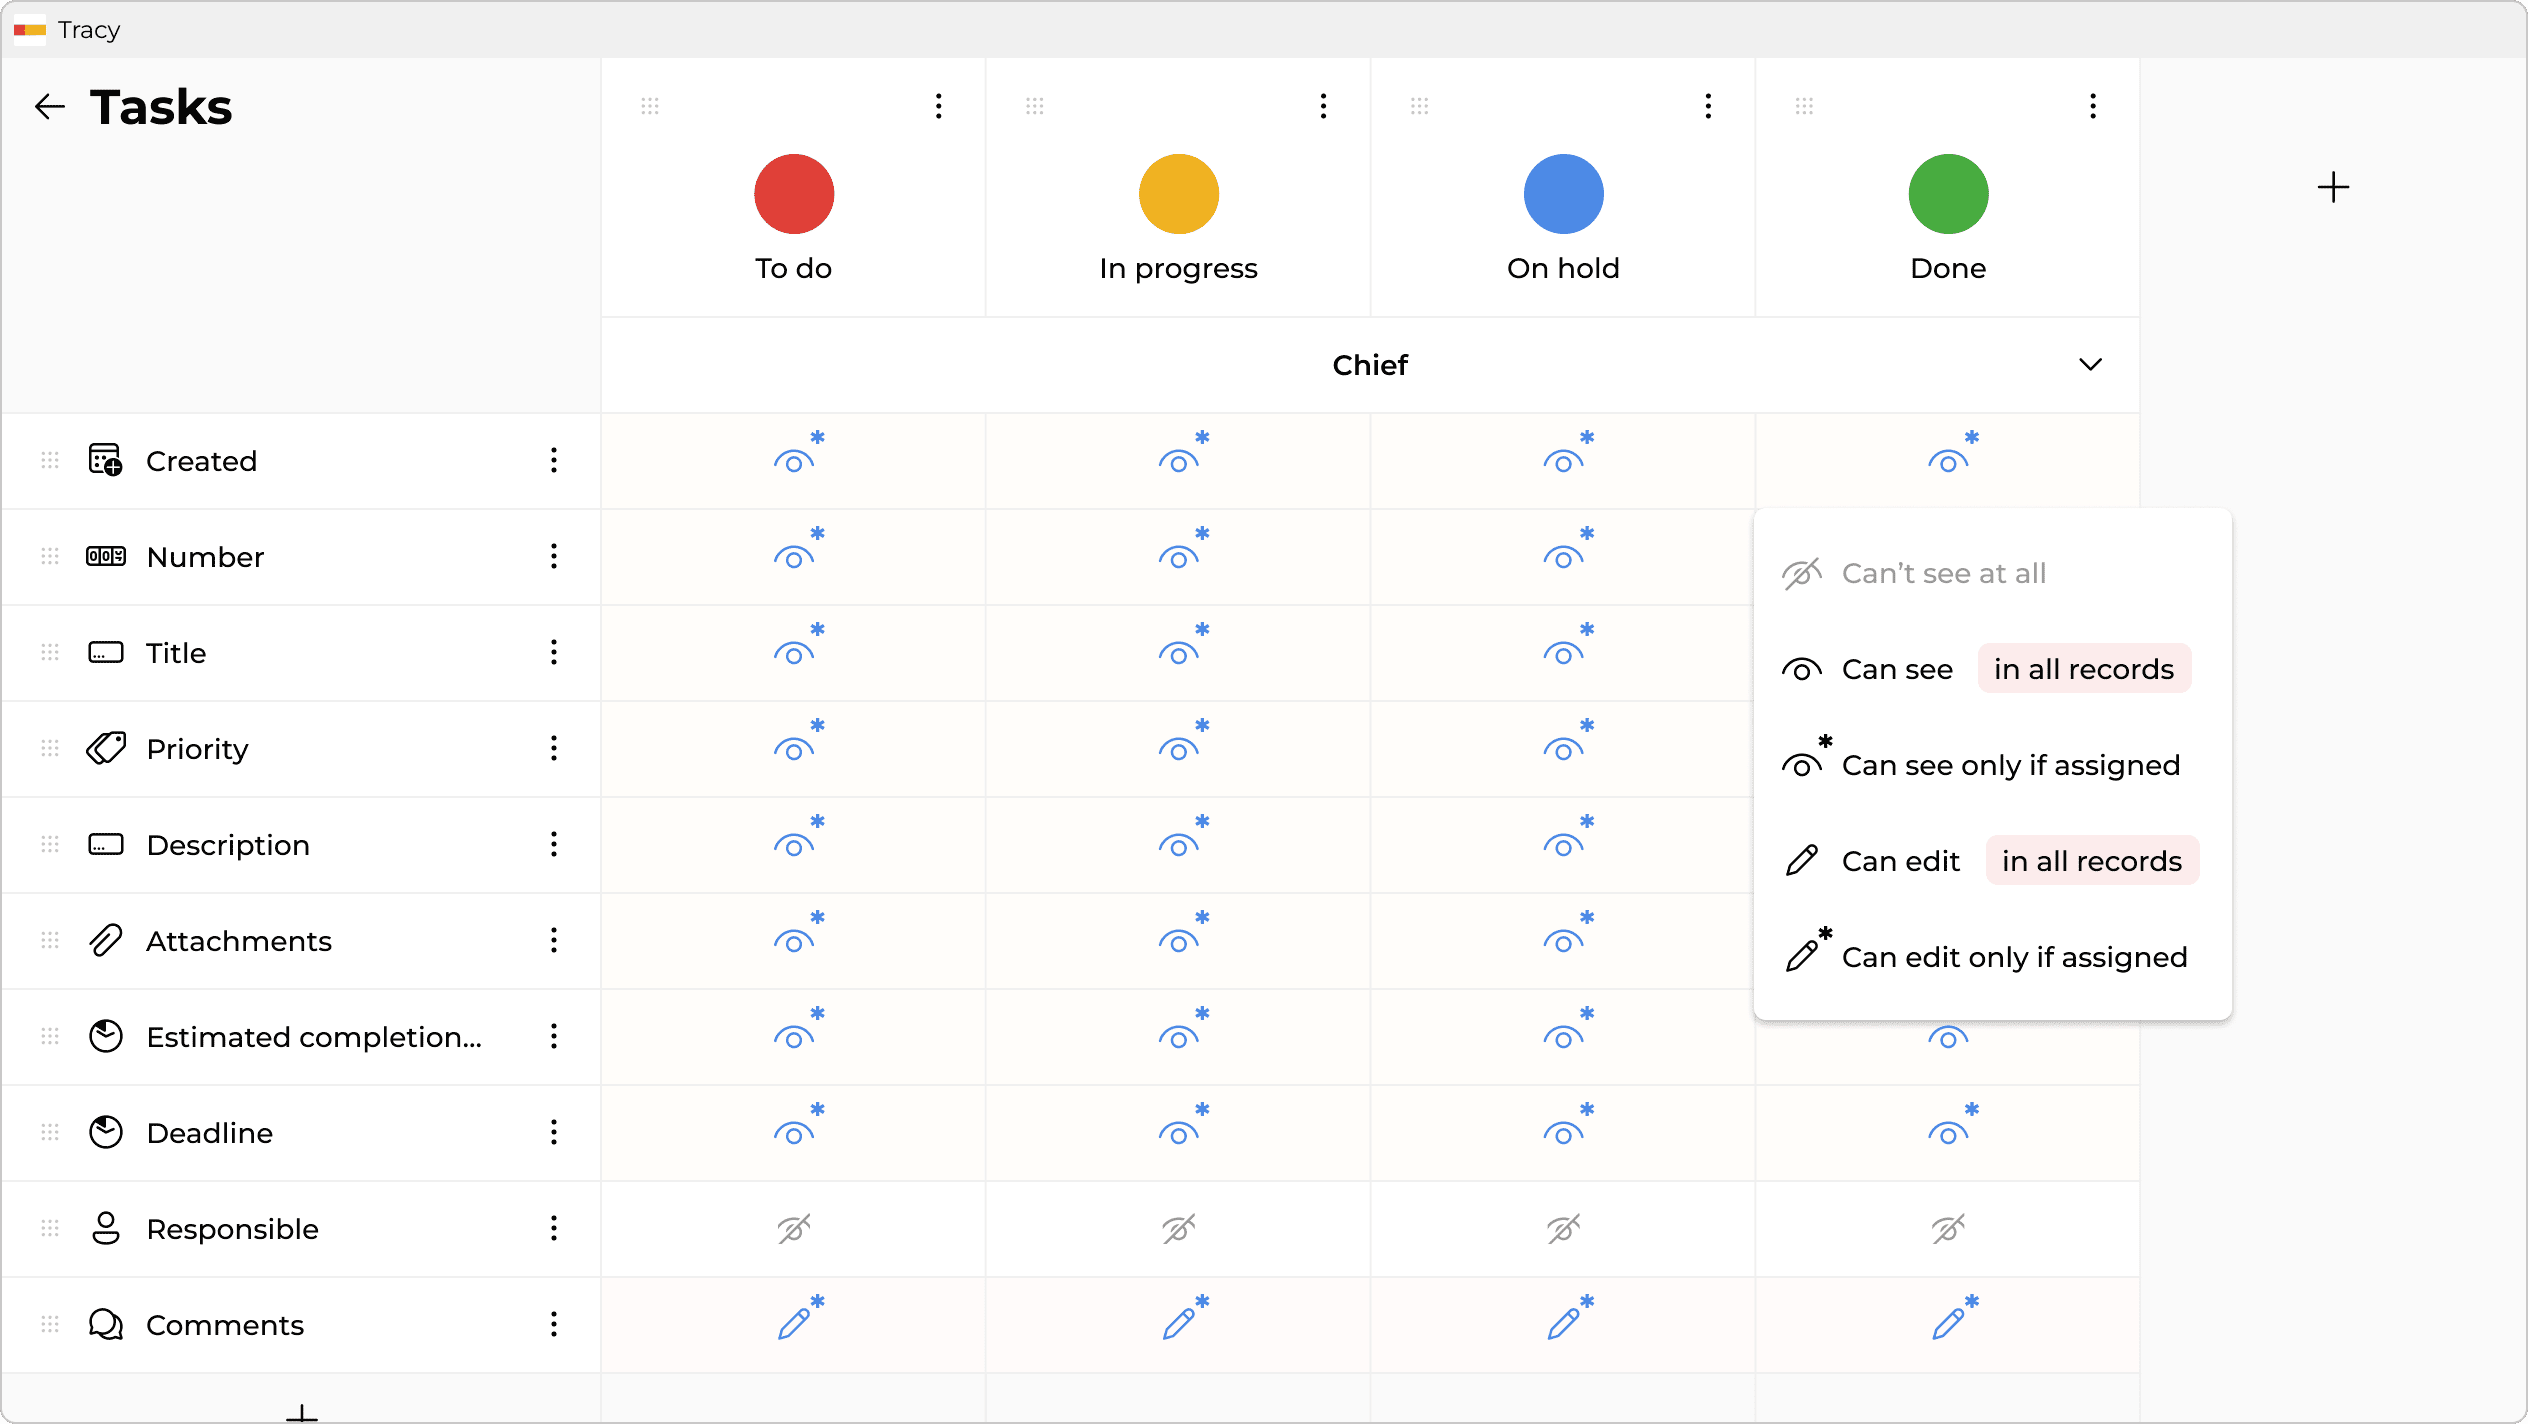
Different roles have different levels of access and freedom to interact with the workspace. We need to go back to the data sets and define which information will be accessible to managers (or “Responsible” according to Tracy’s terminology). We have the following options:
- The manager can view all information on the card.
- The manager only has access to a portion of the data (for example, only the contacts of clients assigned to them, but not those of their colleagues).
The same applies to management permissions. Each user can be given permission to view, edit, create, change status, archive, and delete, or only some of the listed actions.
When setting up, it is important to pay attention to the logic of processes and states. For example, we add clients to the “New” state (column), and from there, we move the card to “Potential”, “Active”, or “Inactive”. Therefore, the permission to create cards should only be given in the “New” state, where work with clients and tracking begins. Allowing card creation directly in other states may cause confusion.
Access permissions are set separately for each role. By default, the manager has full access, while other participants’ access is determined by their role and the specific record to which they are linked.
Step 7: Test and Adjust
Now, let’s check how convenient it is to work with our workspace. Create a new task, or better yet, several tasks. See how they look in different representations. Switch between the view for managers and for executors.
At this stage, you may notice some inconsistencies or discomfort, and you can fix everything right away. For example, it might not be clear which permissions to grant to users with different roles until you test them in practice. The same applies to mandatory fields and representations. For instance, to view the Gantt chart, you need to set deadlines for tasks.
It is completely normal to overlook such details when you are eager to quickly set up your virtual space. Therefore, it is important to allocate some time for a test drive of the platform. It might take just a few minutes, or maybe a day or two, depending on the complexity of the processes and the template’s specifics.
If anything remains unclear, you can always reach out to customer support for help at any time.
Tips for using your virtual workspace effectively
The virtual space for remote work can significantly simplify task management and team collaboration when used correctly. It is not just about “figuring out the functions”. Here are some tips to help make the workspace as effective as possible.
Avoid information chaos
Create an information hierarchy. Break the workspace into sections—primary, secondary, reference, etc. Leave only relevant data on the main panels, and move the rest to archives or reference sections.
Use visual indicators. Color coding, progress bars, and priority labels will help quickly assess the status of tasks without needing to check the details.
Optimize shared tasks
Agree on uniform rules for task formatting, documentation management, and status labeling. Set notifications only for priority tasks to avoid distractions from the important ones. Allocate specific time to review updates, instead of reacting to every message immediately.
Use commenting, tagging, and real-time editing features to avoid task duplication. Monitor the team’s workload. Distribute tasks evenly and realistically to prevent overload.
Maintain order in the space
Set up templates for recurring projects, workflows, and tasks. Define uniform naming rules, tagging, and workspace structure.
Avoid making changes haphazardly. Set aside 15–30 minutes each week to update statuses, review tasks, and clear up digital space. Archive completed projects monthly, delete outdated materials, and update boards.
Improve your workspace
Set up automatic task movement between stages, create recurring tasks, and more. Automating simple processes can save hours of manual work each month.
Evaluate the efficiency of your workspace and make changes to make it even more convenient for the team. Use cross-platform capabilities. Mobile apps and offline access will help you stay productive anywhere.
A simple and convenient workspace is the foundation for successful project management. When everything is in its place, you can quickly focus on tasks and achieve results without wasting time organizing chaos. Set up your online space in Tracy and experience it for yourself.

FAQ
How long does it take to set up a workspace?
Creating a workspace can be done in just a few minutes. The setup may take several hours, depending on the complexity and number of processes. Tracy offers ready-made templates and an intuitive interface so you can quickly set up your virtual space. Choose a structure, add tasks and participants—and you are ready to work!
How do I know which template is right for me if I am a beginner?
Start by choosing a template based on your type of activity. Tracy offers options for team collaboration, personal organization, and business processes. You can always change the settings later and adapt the virtual space for remote work to suit your needs.
Can I use Tracy for multiple projects simultaneously?
Yes! In Tracy, you can create and set up an online workspace for each project and easily switch between them. With convenient navigation, you can manage multiple processes simultaneously without losing control of tasks and deadlines.
 Inna Feshchuk